You've got to see this tutorial! upholstery, upholster, upholstered, jeweled interiors, diy, tutorial, step, by, step, instructions, welt, welting, double, cord, gimp, nailhead, tutorial, bench, chair, drop seat, floral,

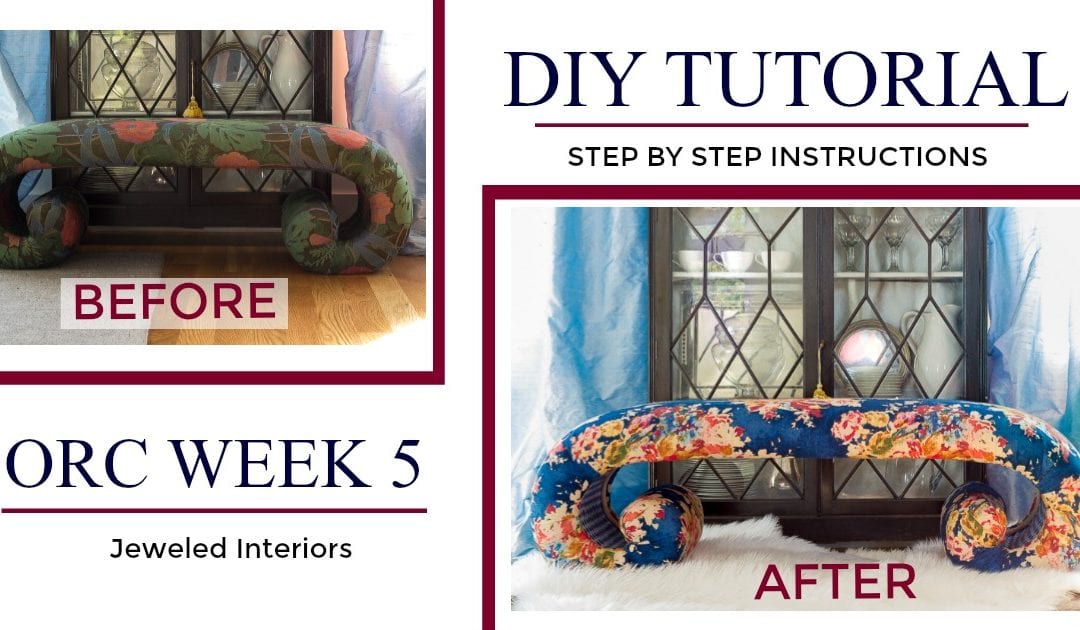
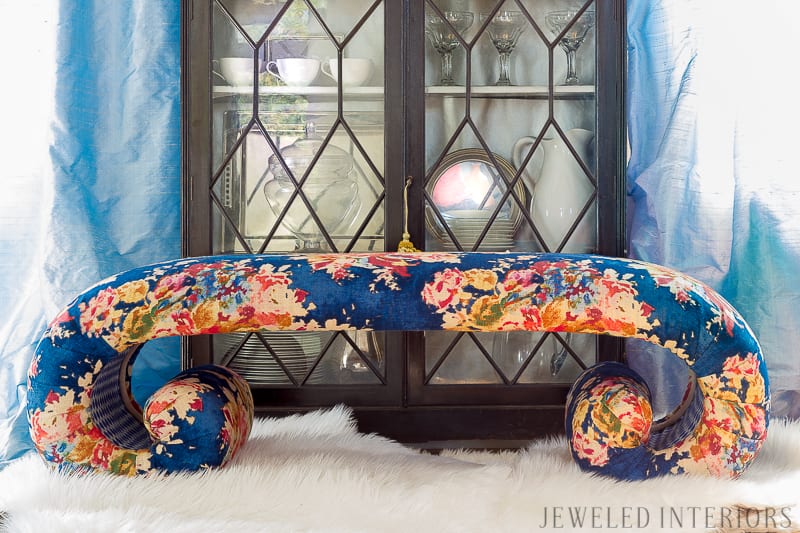
You’d be hard pressed to find an uglier bench than the 1980’s palm tree number I purchased for $30 on craigslist. There was something about this piece, however, that revved my motors…especially after a romantic face-lift with this Covington Venus Basketweave fabric. Check out my step by step upholstery tutorial detailing how you too can end up with the bench of your dreams.

You've got to see this tutorial! upholstery, upholster, upholstered, jeweled interiors, diy, tutorial, step, by, step, instructions, welt, welting, double, cord, gimp, nailhead, tutorial, bench, chair, drop seat, floral,

MORE “BEFORE’S”

You've got to see this tutorial! upholstery, upholster, upholstered, jeweled interiors, diy, tutorial, step, by, step, instructions, welt, welting, double, cord, gimp, nailhead, tutorial, bench, chair, drop seat, floral,

Yep, that was one ugly bench! While it may have been quite lovely when I was in elementary school, it was time to give it a much needed make-over.

You've got to see this tutorial! upholstery, upholster, upholstered, jeweled interiors, diy, tutorial, step, by, step, instructions, welt, welting, double, cord, gimp, nailhead, tutorial, bench, chair, drop seat, floral,

SUPPLY LIST

  1. Fabric
  2. Staple remover
  3.  Scissors
  4. Staple Gun
  5. Staples  1/4 and 3/8 inch
  6. Hot glue gun

Welting (the piping):

6. Sewing machine (zipper foot ideally, but not neccessarily)

7. Self-healing mat

Optional:

6. Upholstery hammer

7. Pliers

8. Scotch guard

STEP 1: REMOVE THE OLD FABRIC

Good news! Upholstery is not rocket science. Actually, it is much more of an art than a hard science. While almost every upholstery project is unique, there is one guiding principle. You are simply reversing the steps that someone took to upholster the beast in the first place.

You've got to see this tutorial! upholstery, upholster, upholstered, jeweled interiors, diy, tutorial, step, by, step, instructions, welt, welting, double, cord, gimp, nailhead, tutorial, bench, chair, drop seat, floral,

My advice to you would be to record every step, especially if re-upholstering a complicated project. Pull out that iphone and snap a few pics my friend. You may find that you need it later

You've got to see this tutorial! upholstery, upholster, upholstered, jeweled interiors, diy, tutorial, step, by, step, instructions, welt, welting, double, cord, gimp, nailhead, tutorial, bench, chair, drop seat, floral,

While the outside fabric was rather ugly, the inside batting of my bench was in good condition. I was thrilled to keep my batting in place; you may find that yours needs to be replaced. If this is the case, try to find similar upholstery products online.

You've got to see this tutorial! upholstery, upholster, upholstered, jeweled interiors, diy, tutorial, step, by, step, instructions, welt, welting, double, cord, gimp, nailhead, tutorial, bench, chair, drop seat, floral,

STEP 2: CUT NEW FABRIC

This step may be slightly harder than it may seem, especially if your new fabric has a large print. There are two ways to go about ensuring that your fabric is cut correctly. The first is to place the fabric directly onto the the piece, staple, and then trim with scissors. For the purposes of this tutorial, however, we are going to use the old fabric as a pattern.

You've got to see this tutorial! upholstery, upholster, upholstered, jeweled interiors, diy, tutorial, step, by, step, instructions, welt, welting, double, cord, gimp, nailhead, tutorial, bench, chair, drop seat, floral,

There are two important steps to keep in mind before cutting. First, make certain your fabric pattern is straight. Yep, double check the grain and repeat. For example, I wanted a big flower on the center of the bench, so I lined up the pattern accordingly.

Second, you will want to leave about three inches extra on all sides of your fabric. I cut this fabric a little too close and it caused me a little grief. Do as I say, not as I did.

STEP  3: MAKE THE WELTING

Not every project has welting.  In fact, even if it does the welting can often be replaced by nail head trim strips or gimp.  These are great options for anyone without a sewing machine.

While you may find that your project is single or double welts, mine was a double welt (a pair of piping sewn together). You can see in the photo below how these two cords were attached by one piece of fabric.

You've got to see this tutorial! upholstery, upholster, upholstered, jeweled interiors, diy, tutorial, step, by, step, instructions, welt, welting, double, cord, gimp, nailhead, tutorial, bench, chair, drop seat, floral,

To make welting correctly you cut about a 2.5 inch strip of fabric on the 45 degree angle. This allows the fabric to fold around the corners with ease. Now, I will admit that I have skipped the 45 degree suggestion in some of my other projects (usually because I don’t have enough fabric). It may not look AS PRETTY, but it certainly still worked.

You've got to see this tutorial! upholstery, upholster, upholstered, jeweled interiors, diy, tutorial, step, by, step, instructions, welt, welting, double, cord, gimp, nailhead, tutorial, bench, chair, drop seat, floral,

Once your strips of fabric have been cut it is time to wrap the fabric around the cord. I started in the back and wrapped all of the way around the piping. Pin the bad boy like crazy and take it the sewing machine. You SHOULD use a zipper foot, but I didn’t. You can see that the results are just ok. I wasn’t too concerned, however, because my welting was going on the underside of the bench.

STEP  4: ATTACH NEW FABRIC AND WELTING

This is when the project starts to get FUN!

  1. The first step is to lay your fabric on the bench and line up the grain and pattern.
  2. Staple on all four “corners” of the upholstery job.  Make sure that you pull the fabric nice and tight as you do this.
  3.  Continue to staple a few staples at a time, working out from and rotating between your four original “corners”.
  4.  Pull fabric tightly, using your other hand to smooth out all gaps, extra fabric, and unwanted wrinkles.
  5. Don’t be frustrated if you need to use your staple remover to make adjustments and start over as you go.  Its all about finding the right tension while still keeping the grain of the fabric lined-up. This is where it becomes an art vs science.

For me this meant that I stapled under the center of the bench on each side. Then I did a staple or two on each end of the the bench.  Once these four “corners” were in place, I was able to do a few staples flanking each “corner”, using my hand to smooth.  Yep, I had to remove several sections to get it just right. That is just part of the game.

You've got to see this tutorial! upholstery, upholster, upholstered, jeweled interiors, diy, tutorial, step, by, step, instructions, welt, welting, double, cord, gimp, nailhead, tutorial, bench, chair, drop seat, floral,

Once your fabric is stapled on, step back and give yourself a high five. That was likely the hardest part. Now finish up strong. Trim the extra fabric down and continue to work backwards on your steps. I attached a layer of batting before covering it up with my contrasting fabric for the underside.

You've got to see this tutorial! upholstery, upholster, upholstered, jeweled interiors, diy, tutorial, step, by, step, instructions, welt, welting, double, cord, gimp, nailhead, tutorial, bench, chair, drop seat, floral,

As your layers start to get thicker, you may find it useful to switch to 3/8 in staples.

You've got to see this tutorial! upholstery, upholster, upholstered, jeweled interiors, diy, tutorial, step, by, step, instructions, welt, welting, double, cord, gimp, nailhead, tutorial, bench, chair, drop seat, floral,

Once the layers are securely attached to your piece it is time for the finishing touch, your welting. I chose to hot glue mine right back into place.

You've got to see this tutorial! upholstery, upholster, upholstered, jeweled interiors, diy, tutorial, step, by, step, instructions, welt, welting, double, cord, gimp, nailhead, tutorial, bench, chair, drop seat, floral,

If you are worried about your new masterpiece getting dirty then give it a couple of coats of Scotchguard (testing on a piece of your unused scrap first).

Voila!! YOU DID IT! Fist bumps all around!!! Please post before and after pics on my Facebook Page.  I would LOVE TO SEE THEM!!!!

You've got to see this tutorial! upholstery, upholster, upholstered, jeweled interiors, diy, tutorial, step, by, step, instructions, welt, welting, double, cord, gimp, nailhead, tutorial, bench, chair, drop seat, floral,

Let's be Friends

3 + 13 =

You've got to see this tutorial! upholstery, upholster, upholstered, jeweled interiors, diy, tutorial, step, by, step, instructions, welt, welting, double, cord, gimp, nailhead, tutorial, bench, chair, drop seat, floral,

Questions? Comments? I would love to hear from you. Please feel free to leave me a message below.         

-xoxo Jewel


A huge thanks to Linda from Calling it Home. She is the genius who puts this huge One Room Challenge together each fall and spring. Make sure you check all of the other participants here.

Also, a big thank you to House Beautiful, the media sponsors for this event.

You've got to see this tutorial! upholstery, upholster, upholstered, jeweled interiors, diy, tutorial, step, by, step, instructions, welt, welting, double, cord, gimp, nailhead, tutorial, bench, chair, drop seat, floral,

I want More Inspo!

Like what you see?  Join the list for project updates and interior design ideas.

You have Successfully Subscribed!