
How to Make a Pleated Lampshade DIY
Oh man, I’ve got a thing for a good pleated lampshade. I love how you can use almost any pattern, small or large scale, to instantly dress up an old, or new, lamp. I am excited to show you the lessons I have learned in this process so that you can give it a whirl as well.
A couple of weeks ago I tried my hand at a DIY lampshade to go along with my piano bench tutorial. My first attempt wasn’t perfect but I learned some takeaways.

On this lamp shade I didn’t line it, I used pre made biased tape (with plans to replace it) and had some bulky parts on the top. I definitely left room for improvement.

Pleated Lampshade BEFORE
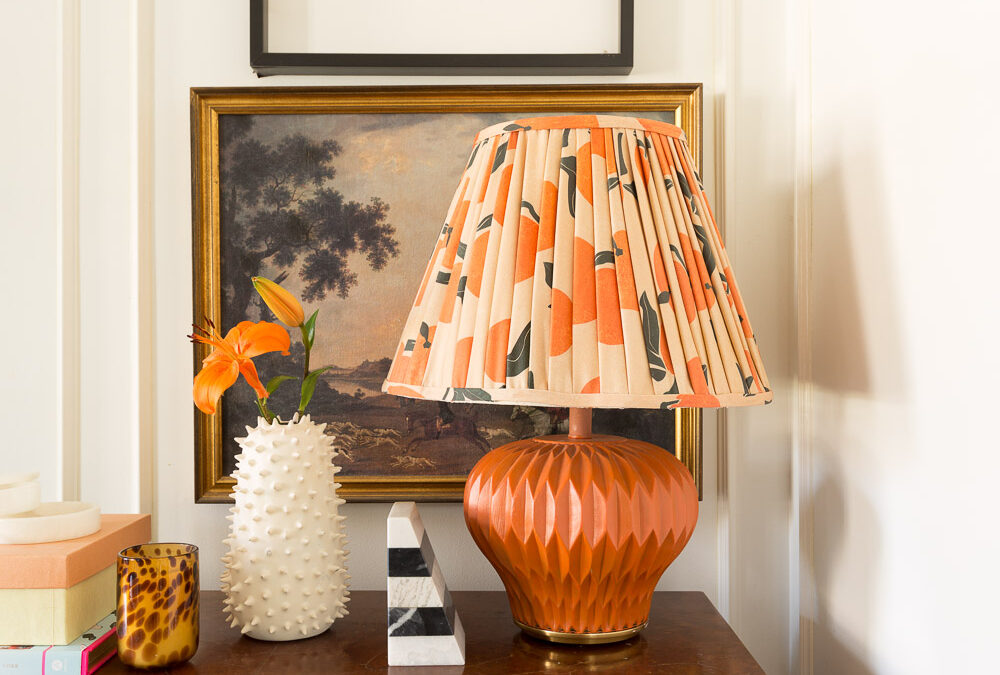
Round two I started with this lampshade and lamp. The base of this lamp is painted in Charlotte’s Locks Orange by Farrow and Ball.

Pleated Lampshade AFTER
After two half day’s work I transformed it into this cute pleated lampshade.
")
Pleated Lampshade Supplies
TIME:
This isn’t a hard project but it does require a bit of time. Luckily, much of the time drain is hand sewing which is a mindless task that could be done while watching TV, talking to someone, etc.
Supplies:
Lampshade with metal braces vs plastic support
Fabric for lining (white is a good option)
At least 2 yards (up to five or six widths of 54 inch wide) fabric + 1 yard for bias tape
I used this cute Fabric (sponsored) by Spoonflower. It is called Mid-Century Cilementines on Sandy Beige by Erin Kendal b
Strong needle
Heavy thread (I used waxed upholstery thread)
lining
Sewing machine (Nice not required if you can hand sew)
Fabric cutting mat (nice but not required)
Bias tape maker (optional)
Clothes Iron
Pleated Lampshade Step 1
Figure out a plan for lining

I opted to keep the lining from the previous shade but if you are starting from scratch on the lining you can do this step at the end. In that sense I did this process a little backwards.

I cut out the old fabric but left a little fabric for stitching. If starting from scratch you can do the lining step at the end.
Pleated Lampshade Step 2
Sew together 2 to 4 widths

I sewed together three widths of fabric and used every bit of it while gathering it around this shade. On the previous shade I only used two yards, but it was less wide.
If I were to do this again I would have left less fabric on the top and bottom. There really was no need for this much extra fabric on the ends.
Pleated Lampshade Tutorial Step 3
Start Pinning

Now here’s the tricks to getting this right. Some people find the ratio of the top to the bottom shade widths and then form a pattern and mark out each place a new gather should go. I, however, had a goal of keeping the grain of the fabric perpendicular to the top and bottom lamp rings. If my fabric was consistently vertical I knew everything else would fall into place.
For me, this meant that each top pleat was half an inch apart and the bottom was 1 inch apart.

Because the “corners”are so round I found ruching to be the best option vs sewing a pleat.

I held each pleat in place with a straight pin.
Pleated Lampshade Step 4
Lampshade Stitch
")
Now, I don’t want to confuse you here. If you are sewing the lining on over the pleates yours may look different, but remember, I kept the lining on mine and then cut the fabric down to match.
Here are the big take aways:
Use a strong thread and you will need quite a bit of it
A thimbal might be helpful
Try to keep your stiches inside the imaginary 1/2 in boarder of where the trim will cover.
Use a lampshade stitch.
Work all of the way around pulling away from the center of the shade as you go.
Pleated Lampshade Step 5
Bias Tape

Cut the fabric at a 45 degree angle. Since I was aiming for half inch bias tape I (eventually) cut the fabric down 1 1/4 in fabric.

Knowing that the bottom of my shade would need extra bias tape I needed sew two pieces right side together on the angle shown. Then cut as close the the seam as comfortably possible. Then open it up to check that it is one cohesive looking piece of fabric.
Iron it all flat, and press the seams open if required.
")
Then run it through the bias tape maker ensuring that you iron and press as you go. My shade looked best with 1/2 in size bias.
")
")

I love it sooooo much! And you did it so quickly!
Thanks so much Haneen!
Well, this couldn’t be more timely! I was seriously *just* looking up tutorials for how to do this. Thank you!
Jewel I am so glad you love color. I am sick to death of grey and all white. It is good to know there is someone in the world that is not from a herd of sheep. Great job. Keep it coming.
Oh good Amy!
LOL Thanks! I agree that the world is more fun with color