
Wicker Tub Front Panel DIY- Jeweled Interiors Spring 2020 One Room Challenge Wk 2
As we roll into week 2 of the One Room Challenge and I’ve been scheming and working! I’ve developed a wicker tub front panel diy to hide the dated unit that is original to this 1994 home. I’m very pleased with the outcome, and am excited to show you the steps to this easy update.
What is the ORC?

I want to start out with a huge thank you to Linda, from Calling it Home, for organizing this massive event. Thanks also to the media sponsor, Better Homes and Gardens. I love that they are working together to create a community of interior designers, bloggers, creatives, and design enthusiasts to cheer each other on during this interesting times. One Room Challenge for the win!
Supplies for Tub Front Panel Frame
Supplies
(based on a 59in W 14 in H tub)
15 (ish) LF of 1.5 in x 1.5 in lumber
5 ft of 14 in by 16 or 14 in cane webbing. I see several other options on Amazon.
Staple gun and staples
Hammer and Nails or 16/and or 18 in gauge nail gun
1 piece of Schluter color of your choice (optional)
Screws and screw driver
Scissors and or razor blade
Putty, sandpaper, brush, paint, and varnish
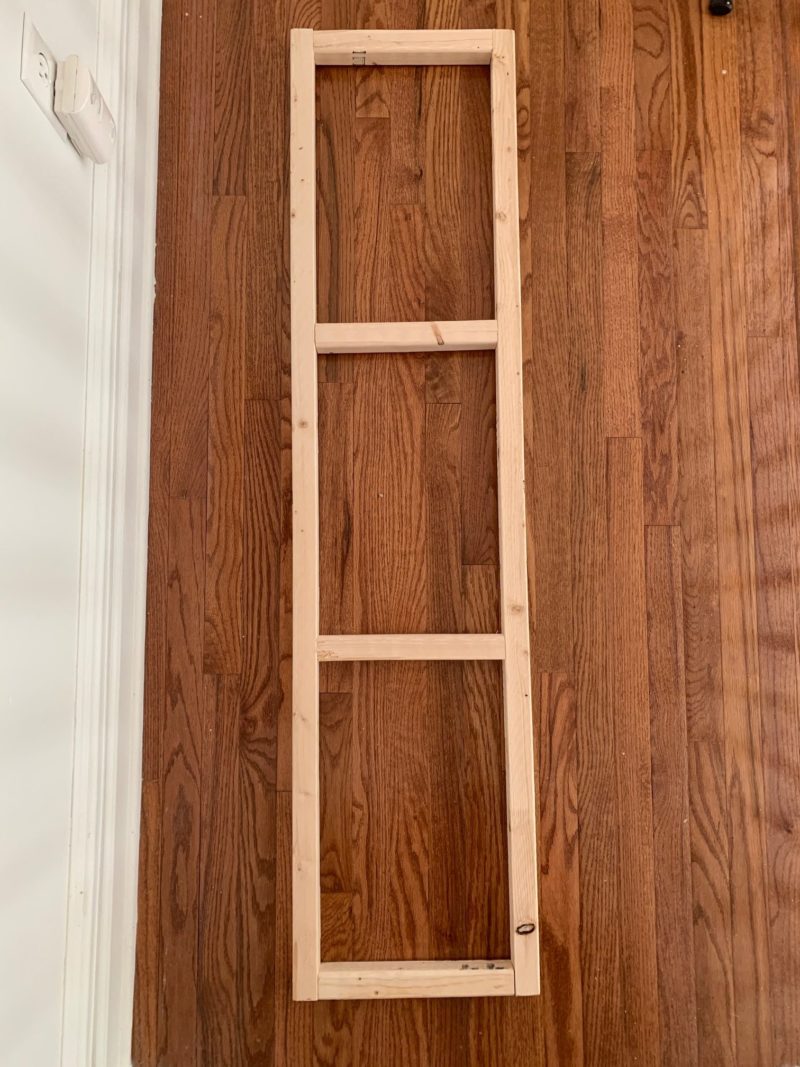
Step 1: Build the Tub Front Panel Frame
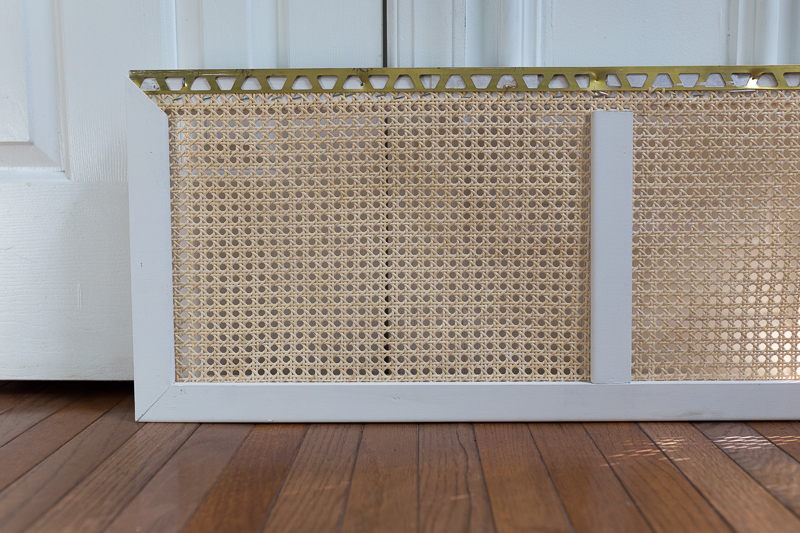
The wicker is stretched around a very basic frame. If you can meausre and cut a clean 90 degree angle, then this will be easy for you. Simply miter the 1.5x 1/5 in wood to the exact length and height of your tub. Then meausre out to cross beams. Drill holes, and then sink in screws in each corner. This should be decently sturdy because you will be applying force when installing the cane.

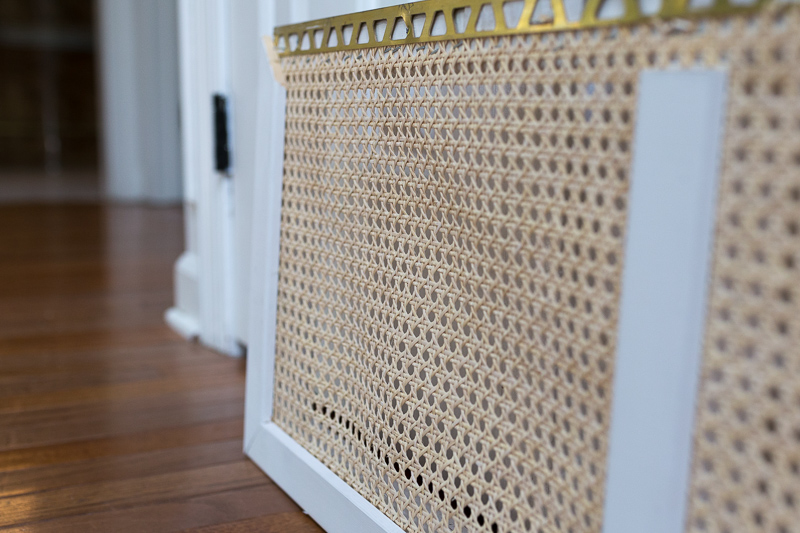
Add two cross beams, leaving three eaqual sized rectangles. The finished frame will look something like this:
Then putty the very top section and paint the entire tub front panel white. Optionally, you leave it neutral and seal it with a waterproof finish.
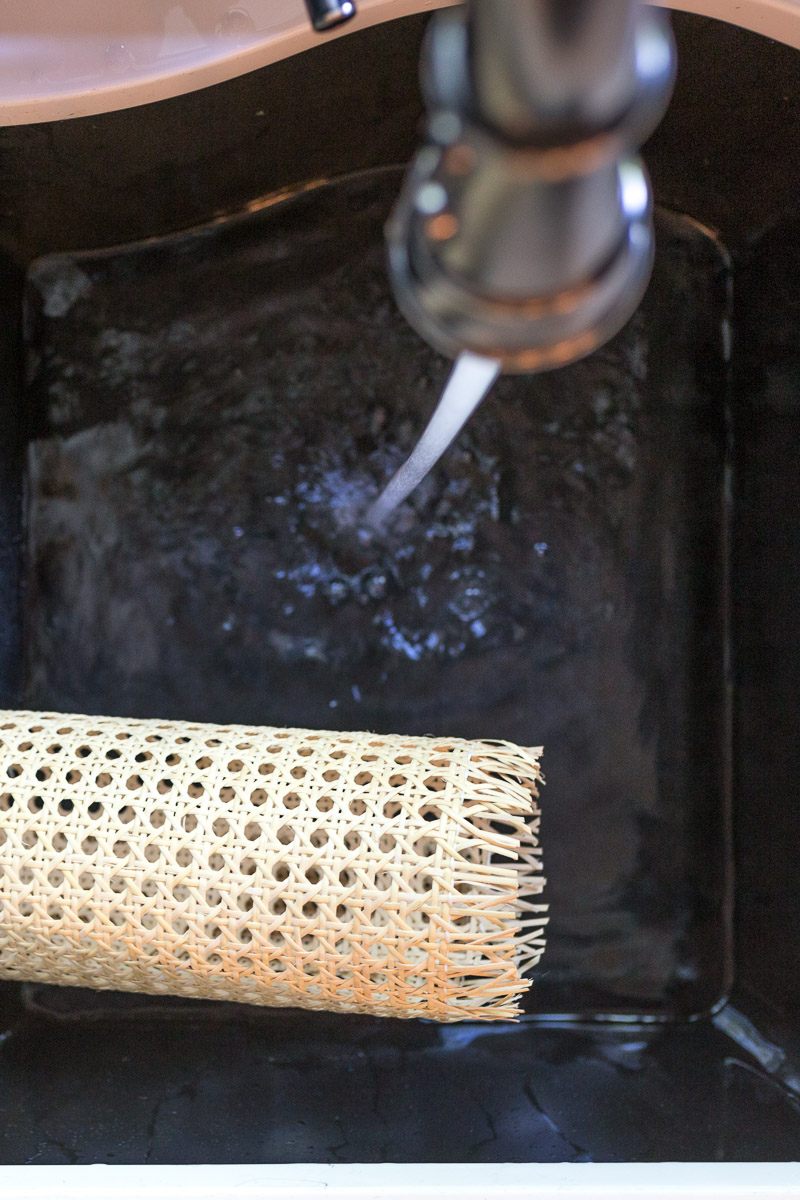
Step 2: Soak the Cane
Soak your cane for 20-30 mins. This will make it taut once dried.
I learned this lesson the hard way. After I finished the tub front panel the first time, I woke up to a saggy, sloppy mess. I knew I would need to restretch the cane.
After some research, I realized that soaking, and thoroughly stretching was the key to a more professional finish.
Step 3: Attach the Cane to the Tub Front Panel
The second time around I made a concerted effort to REALLY stretch the cane. I also went about it a little bit like an upholstery project. I stapled in the center of each side and then, while stretching, pulled straight and worked towards the corners.

Notice how many staples I used. I tried to secure every little cross-section of the wicker.
Once secured, I let the wicker tub front panel dry. I actually used a hair dryer to speed up the process, and it worked well.
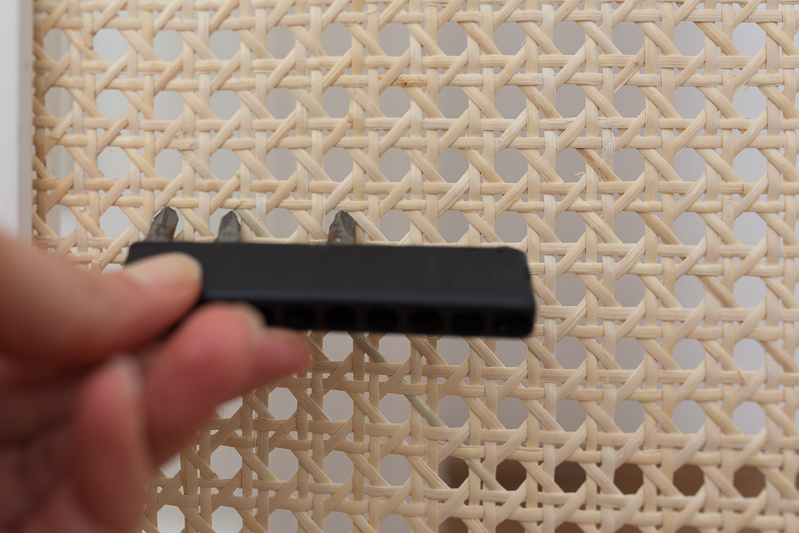
HERE IS A TIP!:
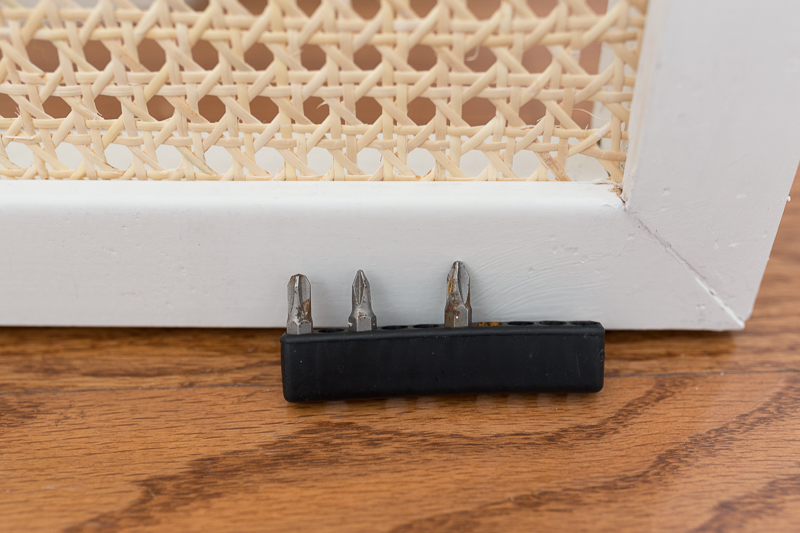
I had a hard time stretching it with my fingers so I devised this concept out of a row of screw heads. I was able to customize the size, and then got even tension as I stretched.
Step 4: Attach the Schluter (optional)
I could have just used caulk here, but decided that the Schluter looked more finished along the top.
If you are opting for a more permanant design, you could skip this step and add a piece of marble, or quartz to the top. Since this is simply a refresh, I am ok knowing that the cane will not last forever. The hope and expectaion is that it will last long enough for me to formulate a gut job design plan in the next couple of years….hopefully COVID 19 will be in the history books by then.
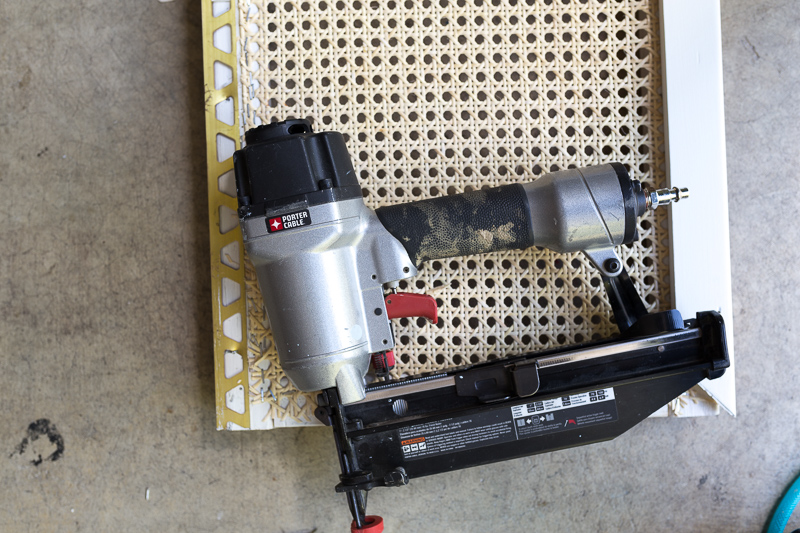
You can see in this image bleow (taken as I deconstructed the unit to get the wicker tighter) that I attached the Schluter as flush and evenly as possible.
I used a 16 guage nail gun to sink through the Schluter. A hammer and nail may work as well.
Step 5: Trim it Out
I cut all of my pieces of trim to line-up with the dimensions of the frame using my miter saw.

I was careful to ensure straight angles, and put extra effort into lining up the pieces perfectly.

Then I used my brad nailer to attach the trim over the trim pieces to the front.

Step 6: Putty, Paint, Varnish
Last, but not least, I puttied, painted and sealed the frame.

Step 6: Install
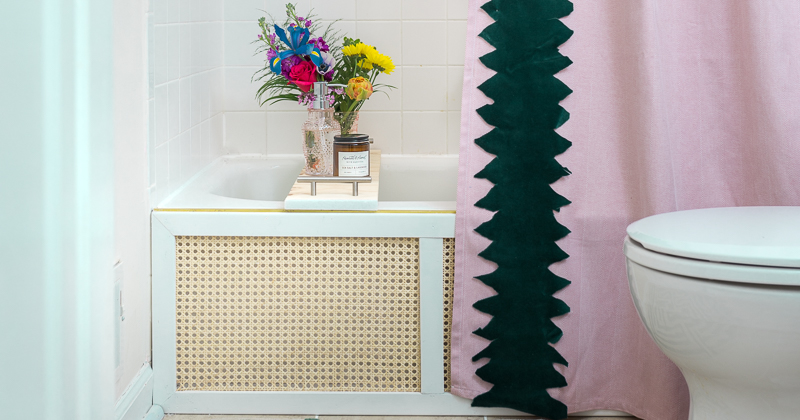
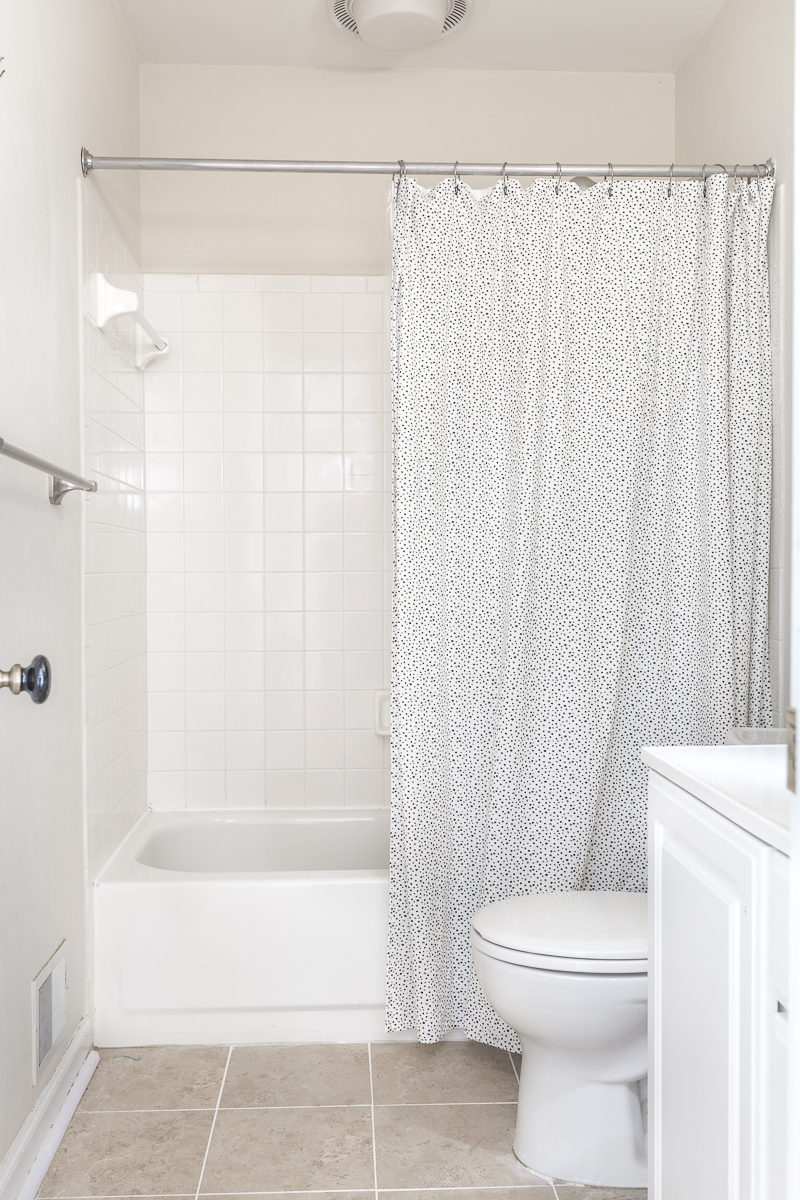
Here is the bathroom before the tub front panel installation.
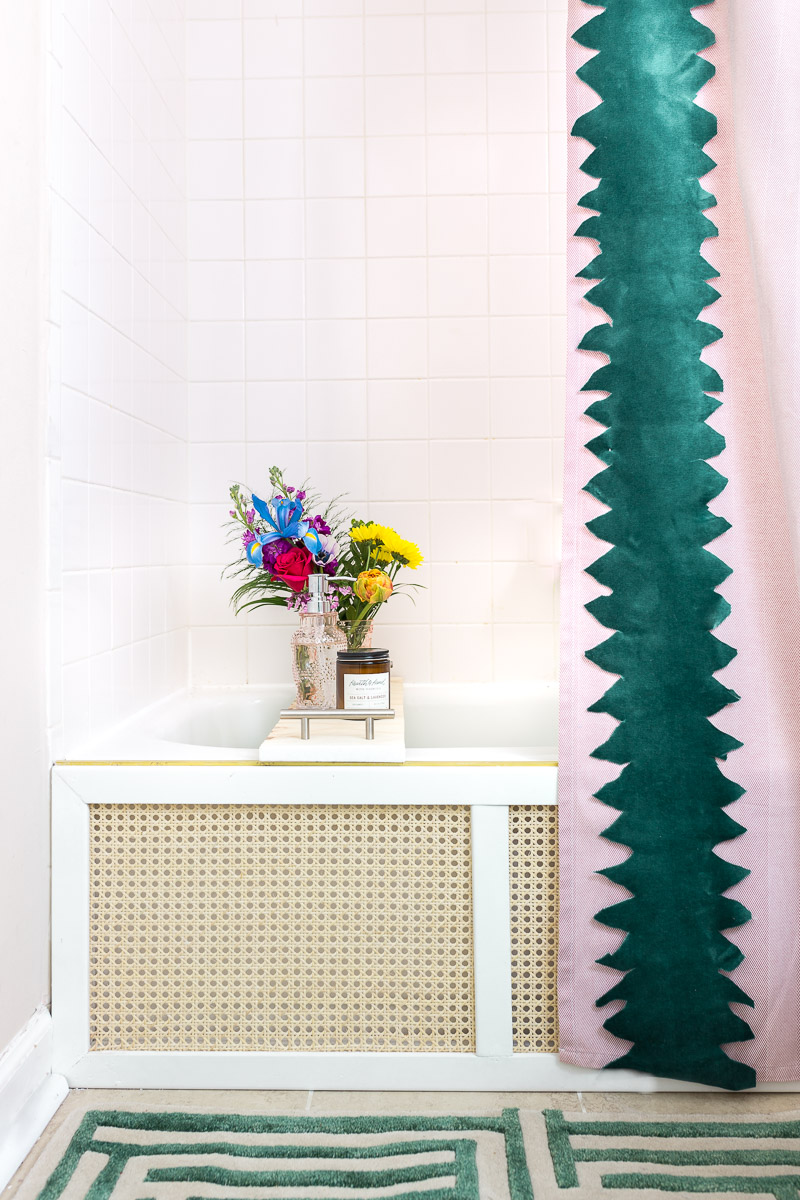
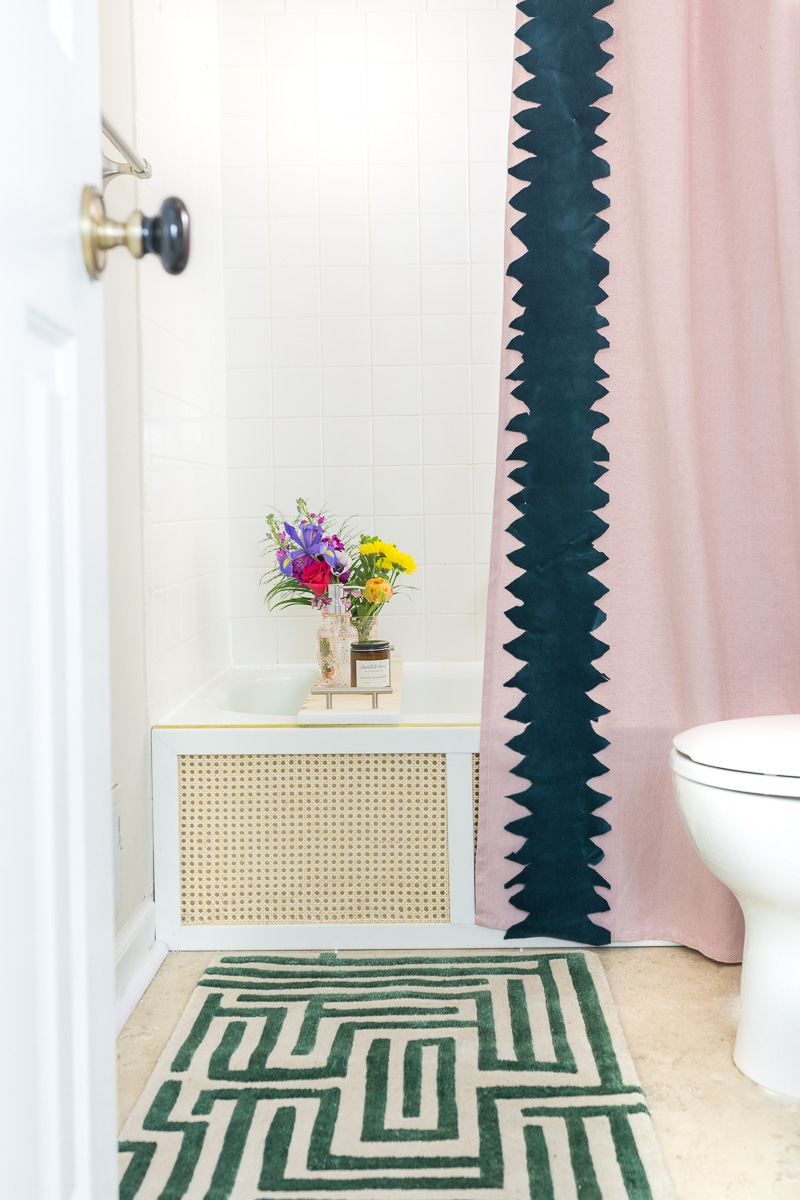
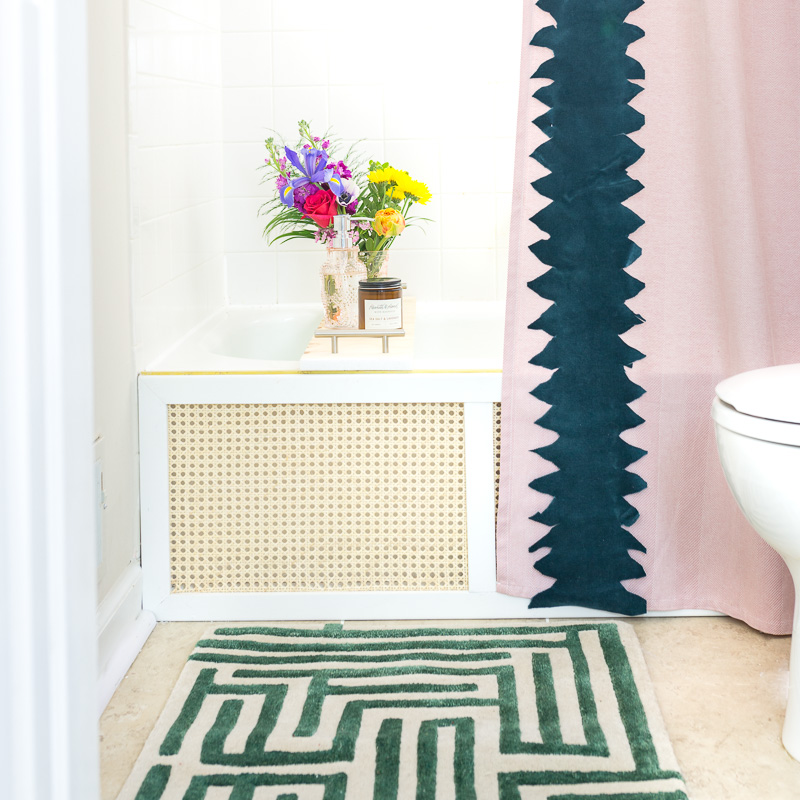
Here it is after. The cane not only hides the tub, it adds a certain warmth and polish to the space.
I’m planning to take this same concept and use it on a larger scale in the future. I think it would easily work as a headboard or daybed frame for my daughter’s room.

The Bathroom Plan

So, um yeah….That’s a big change. I know. I think I just wanted something totally FUN! A little jewel box of a room that makes me smile every time I walk by. The kids are being great sports. They are so use to at least one room of the house being under construction at all times.
Kids Bathroom Sources
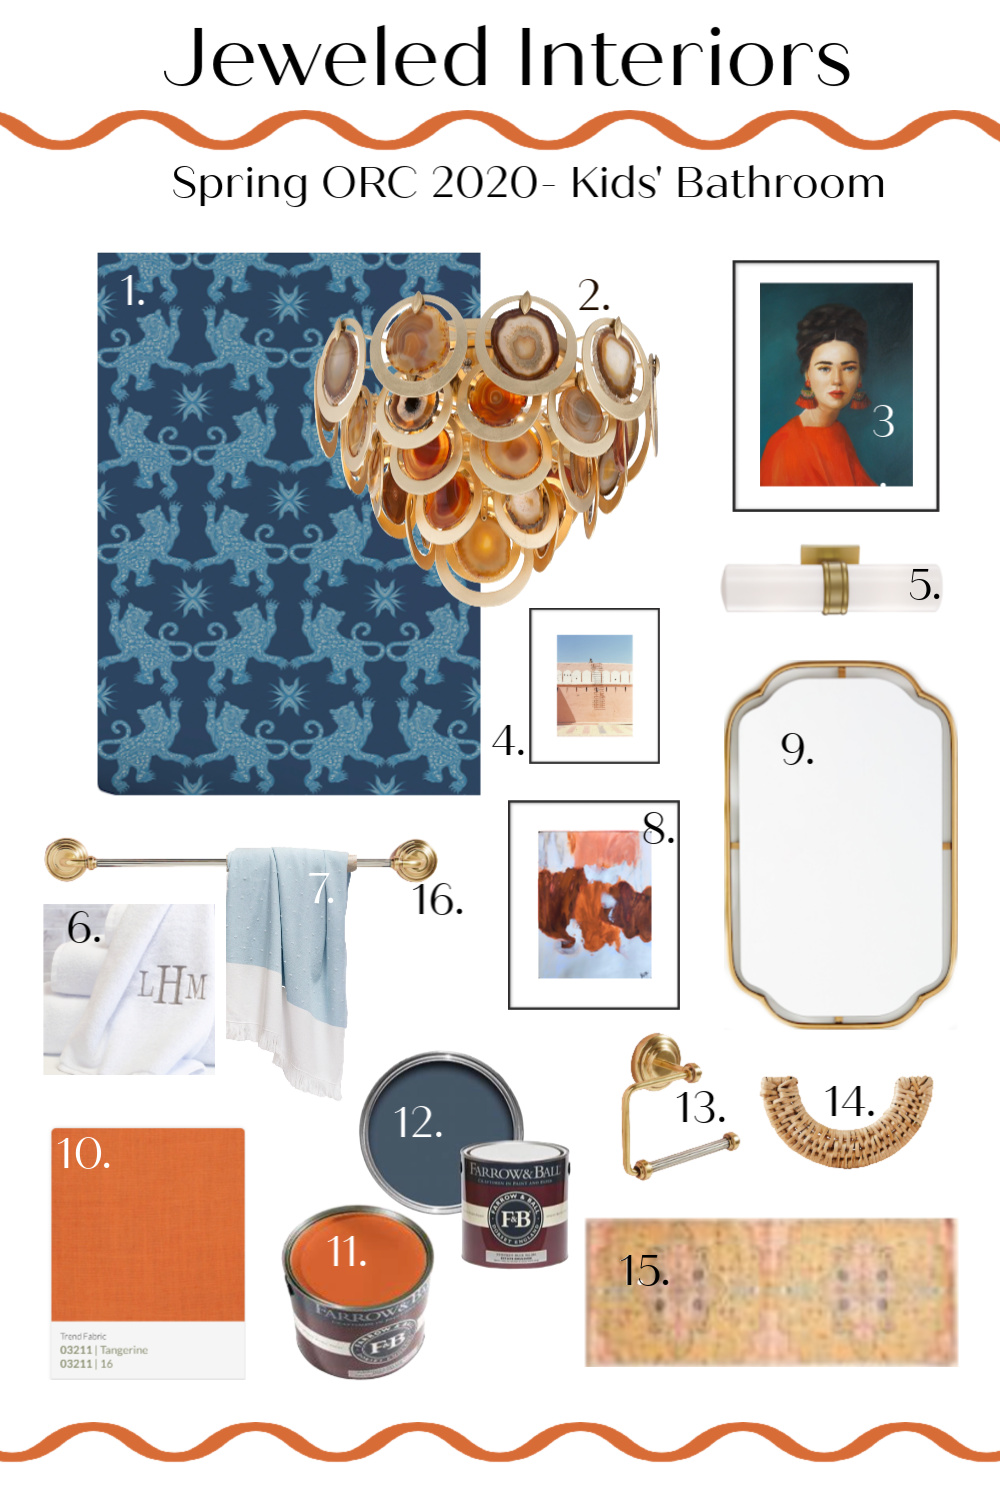
Sources
1. Hygge and West– Palace (Indigo)
2. Corbett Lighting (HVLG)– Rock Star Chandelier
3. Artfully Walls– Florida by Janet Hill
4. Artfully Walls– Karni Mata Temple by Andrew Jacana
5. Mitzi Lighting (HVLG)– Natalie Sconce
6. Crane and Canopy– Monogrammed Plush Towels
7. Crane and Canopy– Blue Dot Fouta
9. Anthropologie– Perla Mirror
10. Trend Fabric– Tangerine 03211
11. Potomac Paint and Design Center– Farrow and Ball Charlotte’s Locks
12. Potomac Paint and Design Center– Farrow and Ball Stiffkey Blue
13. Anthropologie– Sylvie Toilet Paper Holder
14. Anthropologie– Mia Rattan Handle
A Huge Thanks to my Fabulous Sponsors
KID’S BATHROOM TO DO LIST
Install Crown and Chair moulding (Metrie)
Paint Trim in Charlotte’s Locks (Farrow and Ball)
Paint vanity in Stiffkey Blue
Install Anthropologie towel bar (x2), toilet paper holder, hand towel rack, handles, and rug
Hang Rockstar Chandelier (HVLG)
Install Wallpaper (Hygge and West)
Build Tub Cover out of wood and wicker.
Sew Fringe Shower Curtain (discount) (Trend Fabric)
Finalize Art (Artfully Walls)
Learn to homeschool four kids
Stay Safe and Stay home as much as possible
Thank you so very much for joining me on the Jeweled Interiors kids’ bathroom Spring 2020 One Room Challenge. If you like what you see here don’t forget come back and poke around a bit after the link-up. Oh, and following me is fun too. Check back each Thursday as I transform this space into a colorful, soulful, and glamorous abode.

Love your creative solution to this and your plan looks so good!
Thanks so much Ashley! One week down, so much more to go! 🙂
Girl you killed it with this project!
Jewel! This is so up my alley! I love it!! Cane?? Pink?? Green?? Maze patterns?! YES PLEASE!!
I love that so much, Jewel! I wish I had seen this before I did my kids’ bathroom, I totally would have done that for their tub!
I’m considering making a cane headboard and I’ve never heard of soaking it. Should I do that or did you only soak since it will be in a damp location?
Thanks!!
Such a cool idea, Jewel!
Thanks Haneen! Simple updates are great for me right now!
Soaking it helped me stretch it tighter. I would highly recommend it❤️💃
This is so cool! Can’t wait to see the rest!
What a cool solve for a standard-issue tub! I adore the color palette too.
This is so fun! What a great idea!
Love this idea! And I could definitely see this as a headboard. It’s so funny I actually have some caned webbing front nightstands I’m using for our master bedroom reveal. Great minds ; )
I love this idea as a tub panel Jewel!! Such a great way to bring some texture into a bathroom!
Wow! Such a fun, simple update that packs a big punch! Can’t wait to see the final reveal, Jewel.
Thanks so much Julie!
Thanks so much Brianna!
When I used cane for my daughter’s bed I TOTALLY messed up and didn’t soak it…. lesson learned for sure. I am loving everything about this space!
Thanks so much Lisa!!!
Thanks so much Jordan! It is about to get colorful
Oh fun! I’m excited to see that room too! Your tile is awesome!
Thanks so much Erin!
Thanks so much Jennifer! I love your bathroom!
Thanks so much Rachel! I am loving your space!
Thanks! Lots of big changes coming!
Looks great! Do you have a source for the green and white bathroom rug? Thank you!
Hi Ariel! We love this rug! Look up https://www.instagram.com/kfogara/
Looks so good! What a great solution! So excited for this space to come together!
You know I love that caned insert for the builder tub!! Such a creative solution. Our 80’s Master garden tub has an inserted “step” or I would be all about doing this too!!
Jewel, I love this idea! I’m completely obsessed with cane and this is such a creative way to use it. Your creativity is inspirational!
That wicker front is such a fun idea, and brillant idea. We had a jetted tub in our previous home that did not have access panels, we end up having to put ugly vent covers on the newly provided access panels before moving per a home inspector. This would have been such a better solution! I love it.
YES! That cane panelling is amazing! Looking forward to going on this journey with you!
Game changer for a plain tub!! Great job on the tutorial…. just one question, how did you attach it to the tub
Such a clever DIY! This is going to be a beautiful bathroom!
Came out beautifully! Can’t wait to see the finished room – I love the color palette! Blue and orange is my fav combo 🙂
LOVE it! Great tips btw- I have always wanted to cane something. 😊
So cool! I had hoped to do a project with cane webbing this round also but couldn’t get any shipped to Canada 🙁 LOVE how your tub looks!!
Thanks for all the tips Jewel! Had no idea you needed to soak cane and that screw contraption was really smart
Thanks Lindsey. I learned the hard way🤣
Thanks so much Lindsey! I’m so excited about your bedroom!
Thanks so much Casey! Such a bummer about the shipping. I love the nursery tough.
Thanks Joy! Once I figured out the tips, it was really pretty easy. I have some chairs that need recaining. I’m excited to see how that goes.
Thanks Holly! I’m having a little affair with orange these days.🤣
Thanks so much Carrie! It feels good to have one thing done on my list 🙂
Thanks Jamala, I (actually my hubs gets the credit on that part) cut the measurements so exactly that it fits like a glove. I don’t even need a brace.
Thanks so much Suzanne! Me too!
Ohhh Yes! The inserted step! I wonder if you could build a second, smaller version to cover the step? hmmmmmm
Thanks Kayln! It is fun to think outside the box.
thanks so much Rachel! Here we go! 🙂
Thanks so much Jen!
LOL. Same lesson I learned the hard way!🤣. Thanks Miranda
What a great idea! Love how it came out!
Thanks so much Denise!
Oh WOW, I have never seen anything like this before. I’ve never worked with cane before and didn’t know about the soaking and stretching. So good to know!
Same! It was definitely a learning process.
Thanks so much Corinna! I’m loving the progress in your room!