
Roman Shade Tutorial & Tips to Custom Belgian Linen Fabric
Roman shades. Yes, they are gorgeous, practical, and tailored, but this DIY has always intimidated me. It was time to face my fears, and in the process I realized there was no reason to be afraid of this project. Let me show you how I used CUSTOM Belgian Linen, and crafted these stunning shades in this simple Roman shade tutorial.
Thanks to Spoonflower for sponsoring this stunning Belgium Linen fabric. Also, Thanks to Julia Schumacher for designing and customizing the fabric for the shades and pillow.
Note: This tutorial is designed for homes without small children, as the cords can be a chocking hazard.
BEFORE
First, I want to throw it WAYYY back to a year ago when our kitchen eat-in area looked like this.

Then, we did our big kitchen, eat in, and living room makeover last Fall. During that time we temporarily installed gorgeous Spoonflower drapes, but knew they weren’t the most practical choice for this high traffic area. They felt awkward tucked into the bench. Since then, the drapes have been moved to our entryway, and I knew that Roman Shades were needed to help polish the space.
AFTER
Check out the difference that a year has made.

My husband was worried that the Roman Shades would block too much light, but luckily it doesn’t. If anything, the beautiful Belgian Linen gives a soft, filtering effect.
How to Customize Fabric
I have worked with Spoonflower Fabric on a piano bench, a leopard headboard, an upholstered bunk bed, and many more home items. Here is the reason I keep going back for more…Design POWER! With Spoonflower I have an almost endless number of designs to choose from. If that still doesn’t help me find what EXACTLY what I’m looking for, I locate something close and can then ask the graphic design artist to tweak the scale or color. Isn’t that MIND BLOWING?

Take the fabric on these Roman Shades for example. I have had a similar pattern by Julia Schumacher saved in my collection for over a year. When it came time to sew these shades I asked her to change the color from yellow to blue and adjust the scale half the size. Like I said, the ability to customize is POWERFUL in the design process.

Belgian Linen Review
I am so thrilled that I got to try Spoonflower’s new Belgian Linen. The quality is incredible, and I still can’t get over the gorgeous drape. I usually use their Cotton Canvas or Linen Cotton Canvas which have worked great for upholstery and window treatments. However, if you have a little extra budget for your next drapery project I HIGHLY recommend the Belgian Linen. The price is $59 a yard (before discounts) which is far less than most designer Belgian Linen fabrics…and did I mention the ability to customize. Woot Woot!!!

Also noteworthy, I used Julia Schumacher’s Moving Rainbows for the large lumbar pillow. Keep in mind that this pillow is at the upper limits of my sewing skill range. The Roman shade tutorial I will be giving shortly requires MUCH less sewing than this.
Roman Shade Tutorial | Supplies

Roman Shade Tutorial Supplies
Note: I bought many of my cords and parts at my local fabric store (Fabric Place Basement), but I will add Amazon links for your convenience
Sewing Machine
Iron
Drapery Lining
Scissors
Thread (optionally thick)
Dowel the width of your window
Staple gun
Eye hooks
screw driver
Wood to fit in your window. I used 1x2x24 inch boards
Roman Shade Tutorial | Measure & Cut
Now let me show you how I accomplished this look, step by step.
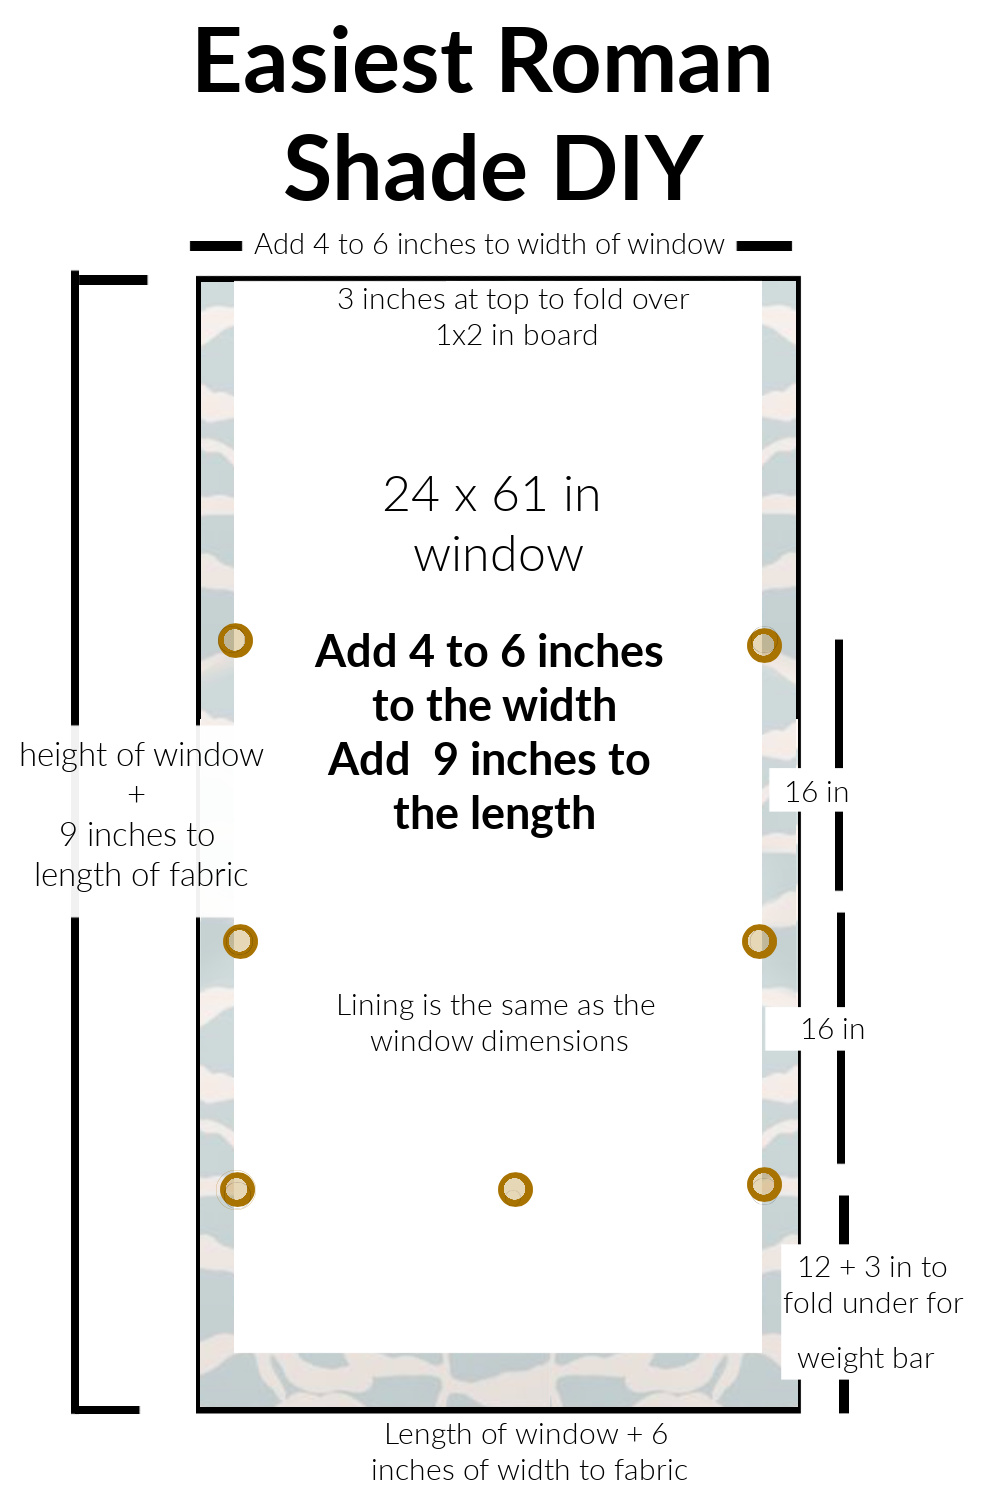
The hardest part for me to figure out for this project was how wide to cut the fabric and where to hand sew the rings. I read blog after blog, and watched around a half dozen Youtube videos (some multiple times). Their measurement suggestions were all different, but here is what I learned.
For the width of your fabric, take the width of your window and add four to six inches, depending on your desired hem width (2-3 inches)
For the length, cut your fabric to 9 inches longer than the length of your window. That way you have enough fabric to do a folded three inch hem at the bottom and extra fabric to staple over your board above.

PIN THIS GRAPHIC FOR LATER
Roman Shade Tutorial | Lining
To cut the lining, measure out the dimensions of your window width and the length plus 3 inches

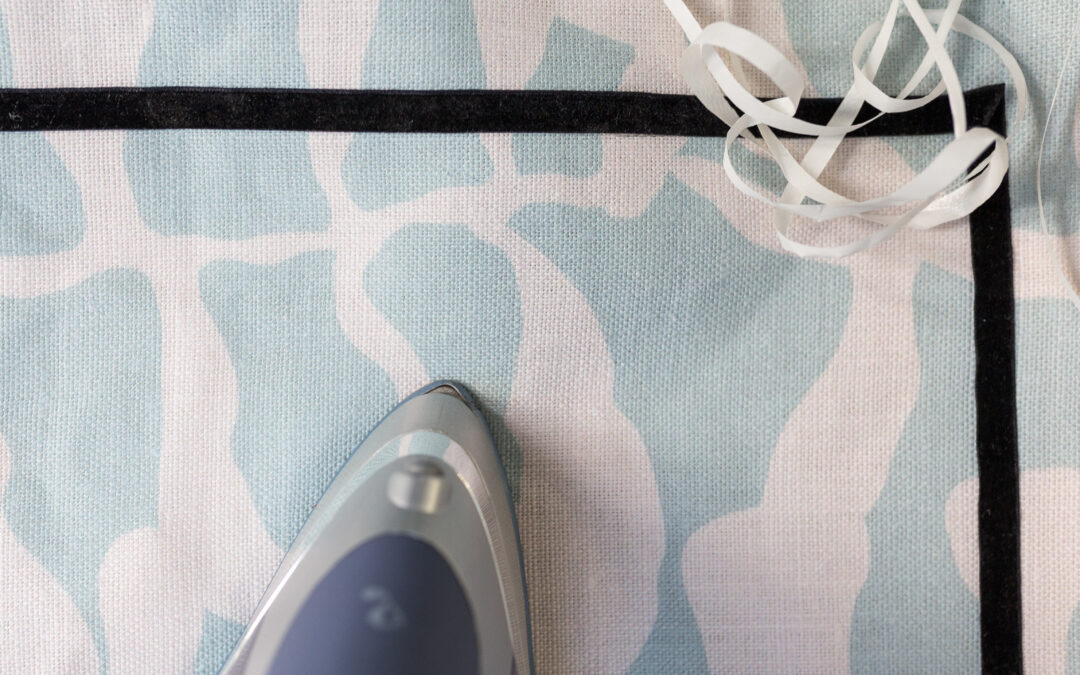
Roman Shade Tutorial | Fold & Iron
Remembering that the outside dimensions of your decorator’s face fabric should eventually be the same width as the window, carefully fold over the remaining 2-3 inches on each side. Make sure to measure repeatedly as you iron down each side.
Then tuck under the hem and iron it all flat.
Finally, pin the lining in place under the hem. Then iron the lining to the hem with an iron-on adhesive (following manufacture’s directions)

Roman Shade Tutorial | Fold your & Iron
Now it is time to think about the length. You will want a 3 inch folded pocket at the bottom for your weight bar. Measure up 6 inches from the bottom of the fabric and iron a crease. This marks the bottom of your shade. The fold the remaining 6 inches in half and sew a seam about three inches up to hold it in place.

Roman Shade Tutorial | Trim (optional)
I opted to apply a small velvet trim to the drapes. Just enough to add visual interest, but not so much as to take away from the fun fabric design. I measured in 1.5 inches on all sides and adhered with hand-cut iron on adhesive tape.
If using velvet trim remember to cover with a cloth before ironing, so as not to melt/crush the velvet.

Roman Shade Tutorial | Rings
The second hardest part about designing my Roman Shades was determining the spacing for the rings. Most people space them out evenly, but I wanted the bottom flap to hang lower to show off my subtle black trim. Here are the measurements that I used.
You can see that I left 16 inches between two of the rings and 12 inches from the bottom of the shade to the bottom ring.
Using upholstery thread sped up the process exponentially.

Roman Shade Tutorial | Staple
Next, staple the fabric to a 1×2 that fits perfectly into your window sill. Not, this DIY worked for me bc I have old wooden windows. If you don’t you may need to search for an outside mount tutorial.


Roman Shade Tutorial | Eye Hooks
Using a hammer if needed, screw the eye hooks along the bottom of the wood. For this size shade I used three rows of hooks.

On one of the outsides screw the eye hook into a Roman Shade cord lock.

Roman Shade Tutorial | Cord Lock

One the other cord lock hole use a screw.
Roman Shade Tutorial | Fold your & Iron
Start by tying a knot on the bottom row in each column and string it up through the rings and eye hook above.

After stringing through the eye hooks, bring the cord across the top and through each eye hooks they pass on the way to the cord holder.

Roman Shade Tutorial | Mount into Window
Once these steps are done, use wood screws to sink from below the 1×2 up into the window frame like below. Then slide the dowel cut to the length of the window into the pocket at the bottom of the drape.


Thanks so much for joining me on this tutorial. Please leave comments and questions below.
What is next? Thursday I kick off our One Room Challenge Space. Can’t wait to let you in on all of the juicy details!!!

The space is beautiful Jewel! ❤️❤️
The internet does not deserve you. These are amazing! Gonna try this.
All your work really is so awesome and beautiful. Simply elegant the way you have created your own art with your designs.
Love love your style 💕💕💕
Thanks! I love that it is more functional now too!
Lol. Back at you babe.
Thanks so much Diane!
Love it! Thank you for sharing ❤️
Thanks so much Gladys!
This is a very informative blog, thanks for sharing about roman shade tutorial fully functional beautiful. I liked and it is wonderful to know about so many things that are useful for all of us! Thanks a lot for this amazing blog!!
Wow! Thank you so much. Your interiors are gorgeous. You rock!
Thanks so much Marsha