
How to Upholster a Bunk Bed
Here it is…The moment that you, or at least some of you, have waited very patiently for….The STEP by STEP, how-to guide to transforming your ho-hum wooden bunk bed into the upholstered bunked of your child’s DREAMS…no really…I mean it…litterally! Dreamy in every way!
XOXOXOXO
Note: The fabric listed in this post was sponsored by Spoonflower. I appreciate their support, and together we have teamed-up to bring you this unique design concept.

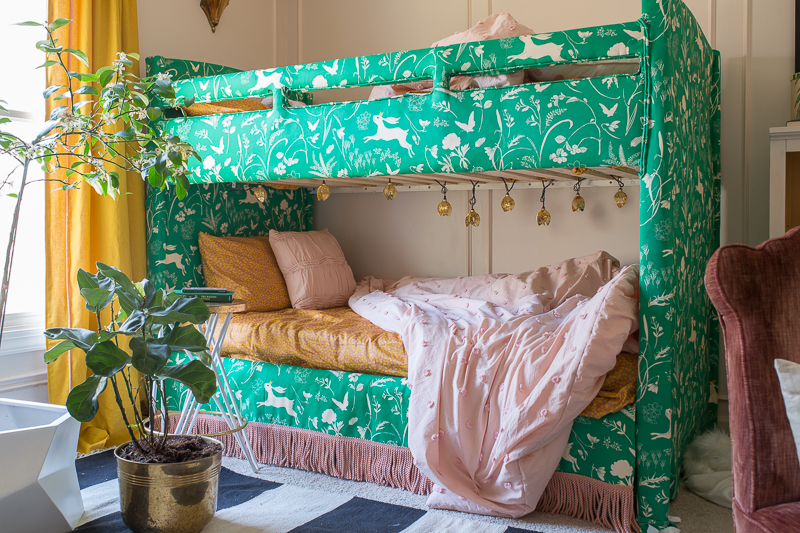
There was technically nothing WRONG with this little bunk bed…It’s just that I saw so much potential here for pattern and color. READY? Check it out!

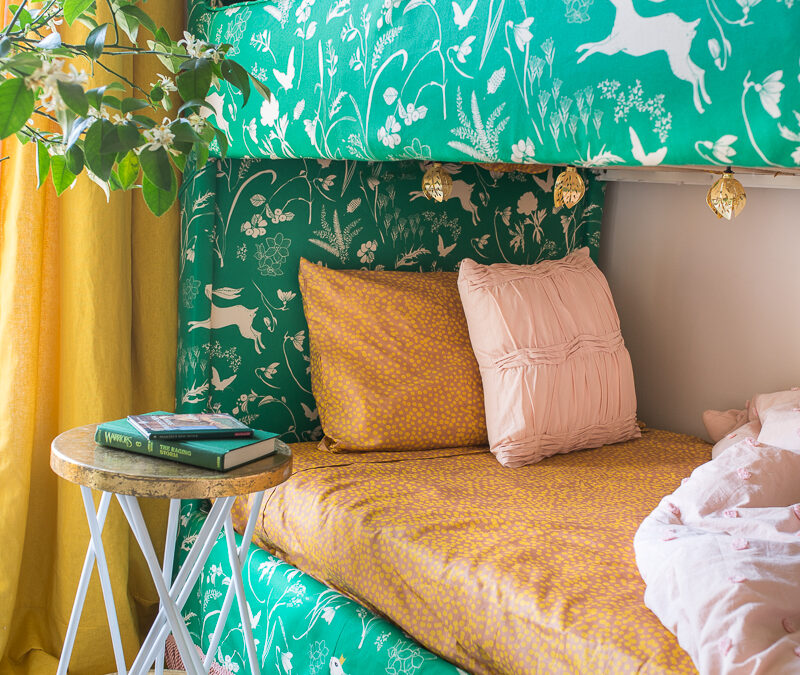
So much better, eh? I can’t begin to tell you just how much we love this new bunk bed. I get all of the feels every time I step into this room, and the girls are still over the moon in love.
While you could use any upholstery material, I think the real show-stopper here is the custom Spoonflower fabric. The scale of the Enchanted Bunny Prince fabric was enlarged for me by the designer, Esther Fallon Lau and then Spoonflower printed out the 11 yards I needed. I have loved using Spoonflower fabric on many of my other projects. Check it out:
Note: while I completed this entire bed with 11 yards, 12 would have given me the ability to sew the welt at a proper 45 degree angle.
Now, there are three things to keep in mind before starting this project.
1. Ensure that the screws are as tight as possible before beginning, This is your last chance to tighten them.
2. If you plan to move any time soon, be prepared to un-upholster (not a word btw) the seams.
3. If your kids are messy little terrorists who color in, hang from, or wear their shoes in beds (been there), this may more may not be the right choice for you. This room is occupied by two relatively dainty little girls who have outgrown the terrorist phase. I am happy to report that it is holding up very well so far.

Supplies
1. 1 bag of batting (48 inches by 10 yards was about perfect)
2. 11-13 yards of fabric. (more fabric for larger patterns)
3. Staple gun (I am so glad I used my pneumatic gun, but a standard $15 one would work too)
4. Staples
5. Piping
6. Large cardboard boxes
7. Staple remover tool
7. Exacto knife
Optional:
Fringe,
Upholstery hammer,
sewing machine, seam adhesive tape, and thread (optional only if you are using a solid or a pattern that can be run horizontally)
Scotch Guard
Because this project was uncharted territory, I changed the design plan 3/4 or the way through. At first I upholstered all THREE boards. In the end that looked too imposing so I went back and left a gap between the top two boards. If I were to do it again, I would start out with this as my design plan…I just don’t want you to be confused by my pics. Kapish?


Now, this first step is probably the most surprising. I wanted to close the gaps on both the head and foot of the bottom bunk. I suppose I could have used plywood or webbing, but this option is definitely more economical and certainly easier. I used the large box which was left over from the new Hudson Valley chandelier and cut it up to three rectangles to fit the dimensions. The staple gun helped me bap those bad boys into place.

Please remember my message above. If I were to do this again I would have left a gap between the top two rails from the very beginning ;). So, imagine me cutting three slits immediately after this next image.

Using the batting, I cut and then stapled two or three layers over the rails.

Next I covered the cardboard on the head and both sides of the footboard.
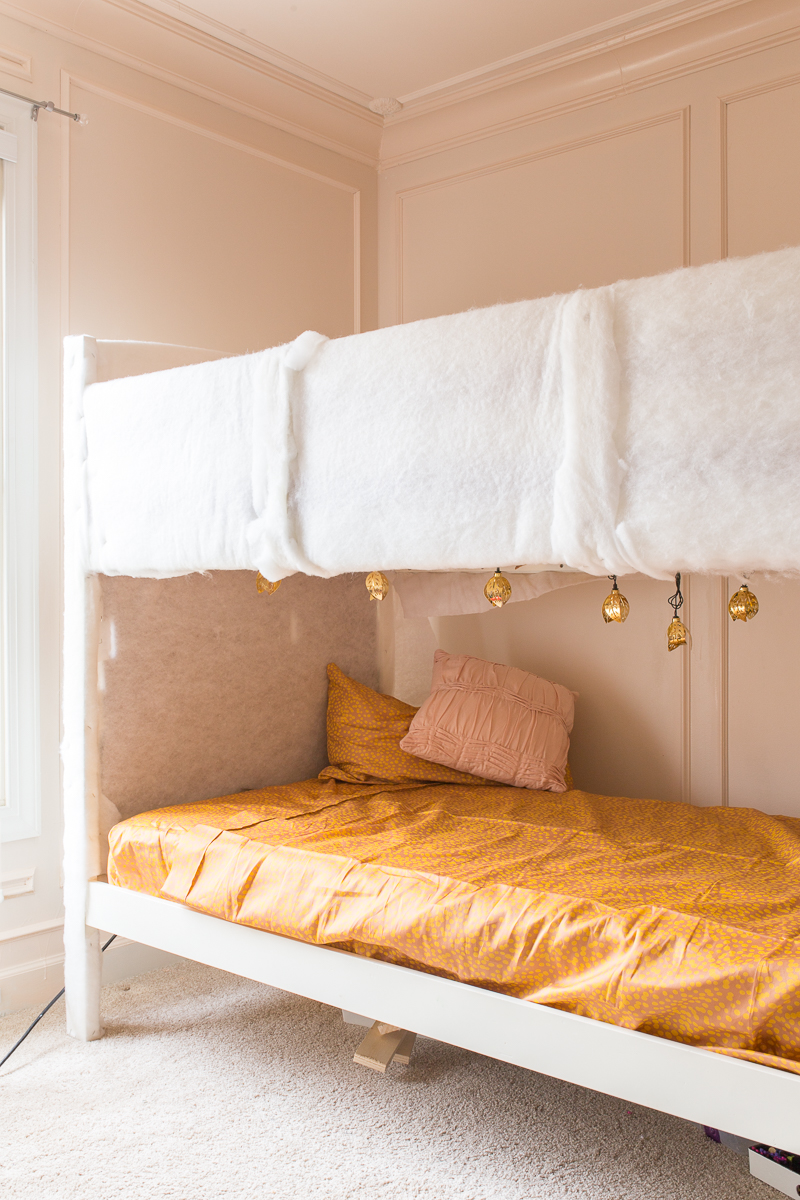
At the end I tried to find the right balance of how much batting to use on the cross beams. Hopefully your bed doesn’t have these, but if they do, no stress. You can see in the photo above that I tried two or three layers of batting, but that was TOO MUCH! I ended up striping it down to one layer.
This step can be skipped if using a solid fabric or one that can run horizontally across the boards without feeling wonky.
Obviously I needed the bunnies to sit upright, and the bed is most certainly longer than the 54 in width of the fabric. To combat this issue, I had to make two seams.
For (nearly) perfectly matched seams I like to use iron on adhesive tape. I line it all up iron the fabric exactly how I want it. Then I stick the tape in between the seam. That way, when I sew the seam on my machine I don’t have to stress about the seam slipping or sliding. You can see that I also used this trick on upholstering a headboard.

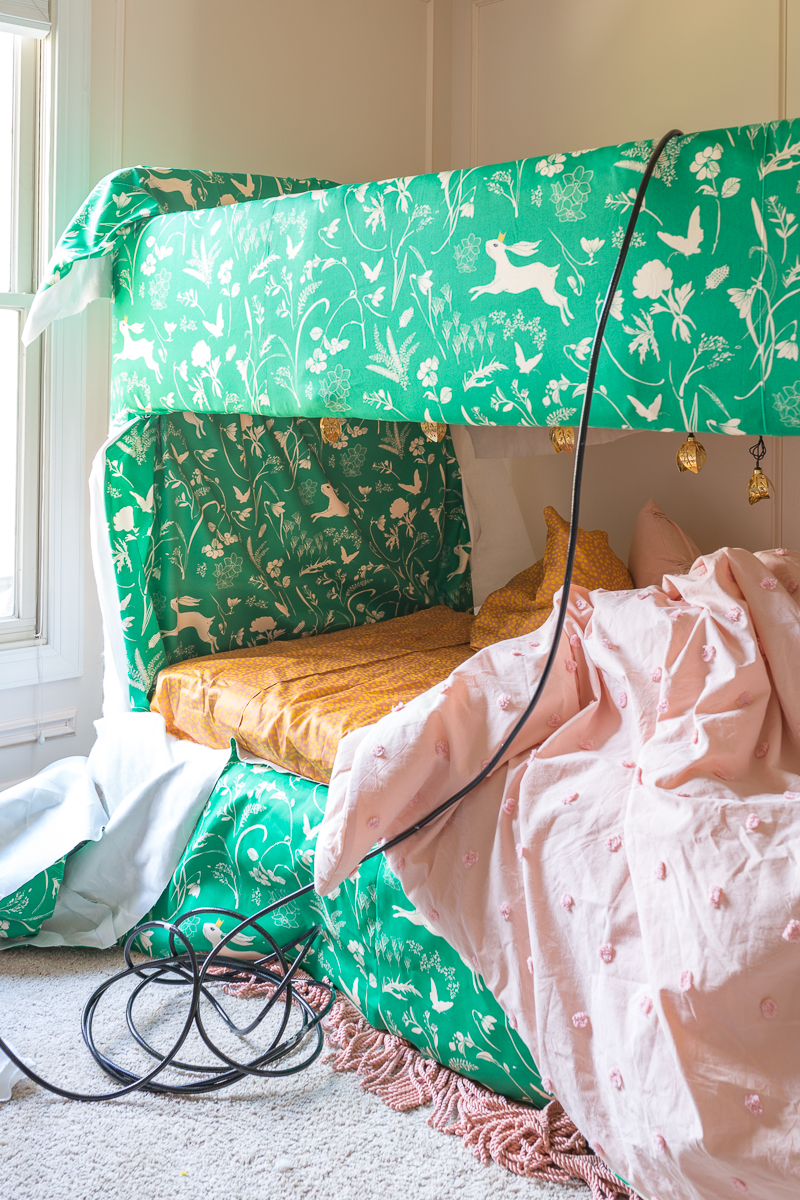
Once the two seams are sewn together it starts to get fun! Drape the fabric over the railings, and start to sink a staple at the bottom, top, and each of the sides. Make sure to straighten the fabric as you go. If it starts to feel crooked use the staple remover to fix it and restaple. Don’t worry about making the ends or top of the fabric folded and pretty. They will be covered by the next layers.

On the bottom, however, you will want to fold the fabric under before stapling…unless you plan to upholster the bottom side of the top bunk. I did not, and I still love it.

It would have been at this point that I would recommend cutting the fabric to add the slits between the boards. Take special care when cutting near the corners. Angle your scissors at 45 degrees towards said corners. If you mess up, like I did one that top left corner (See below), use extra fabric stapled behind it to minimize the visual effect. Hot glue can be added at the end to further minimize the mistake.
Once the top beam is upholstered you can start to take on the rest of the bed. Use the same techniques, but fold the fabric before stapling.

If you opt to add a coordinating bedskirt, you will need to follow the same directions for step 3. Optionally, I added fringe along the bottom. This may or may not be your jam.
To fit with the scale of the top rail, I add some batting to the bottom rail. I used two layers worth and focused one covering the top of the board.
Once the skirt was lined up and just skimming the floor, I stapled along the back side.
I could have stopped here, but it just didn’t look finished. I knew that adding a double welt would cover the staples and just give it an all around polished look.

Notice in the image below that I made a special welt for the gap in-between the boards. I left about an inch space between the two folded cords.

To hide the seams running vertically I used a traditional double welt. It was a huge improvement.
Time to use hot glue along all of the seams for a tailored look. Then clean-up your mess and style.
As for my styling, I picked up these custom sheets from Roostery. They are called Mustard dots on Blush by Julia Schumacher. I think they play well with the Enchanted Bunny Prince bed fabric by the designer, Esther Fallon Lau.
For more pics and a complete list of sources for this space, check out the BIG REVEAL.

YOU KNOW YOU WILL WANT TO PIN THIS FOR LATER 😉

You worked hard, now scotchguard that puppy and go take a nap (yeah right?. #momlife)

AMAZING!!!!!!! Your creativity never ceases to amaze me & im not just saying that because we’re insta-buddies!!!!!!!
Thanks so much Tiffany!❤️❤️❤️
You did an amazing job on that bunk Jewel. Cardboard??! I never would’ve guessed 🙂
Thanks! I like to keep you guessing 🙂
Ah, this is just so, so good! I absolutely love how creative it is, and your tutorial lays out all the details so well!
Thank you so much Kristen! You are so kind!
AMAZING!! What would you suggest for a metal bunk bed, since obvious really a staple gun isn’t usable? Thank you 🙂
Hi Olga! That’s a great question. I don’t have a fabulous answer. I wonder if it would be better to sell that one and buy a wooden one? I’d love to hear what you do!