
It’s not that hard. Check out my step by step tutorial explaining how I tackled this channel tufted headboard DIY.
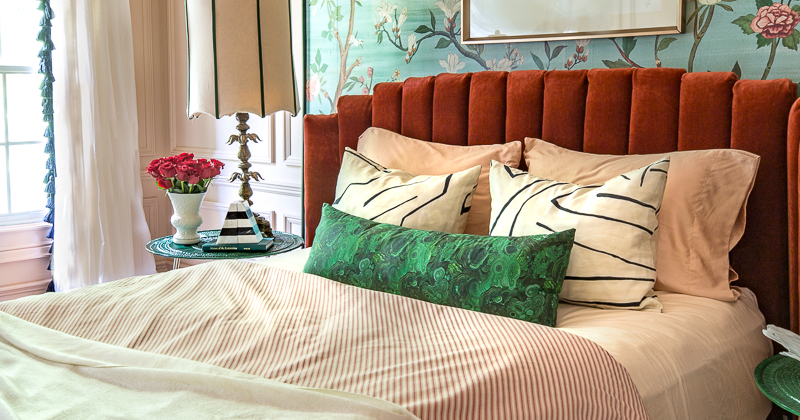
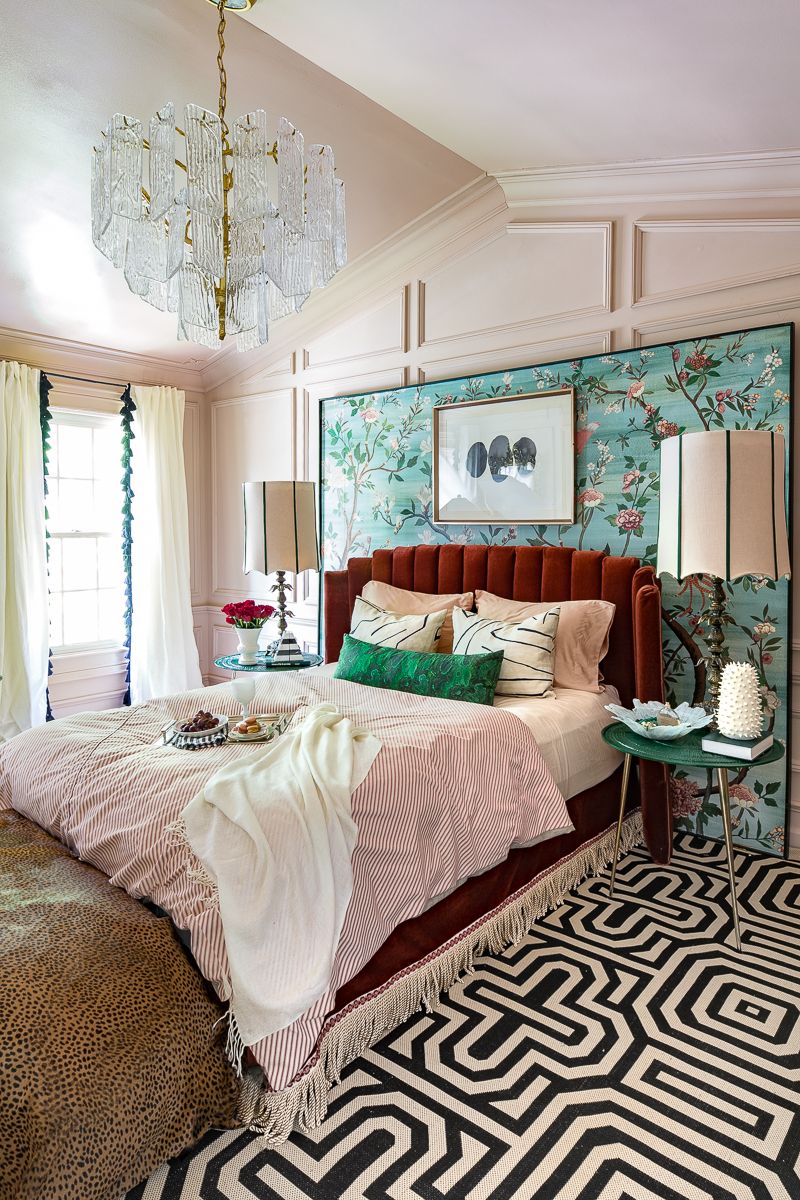
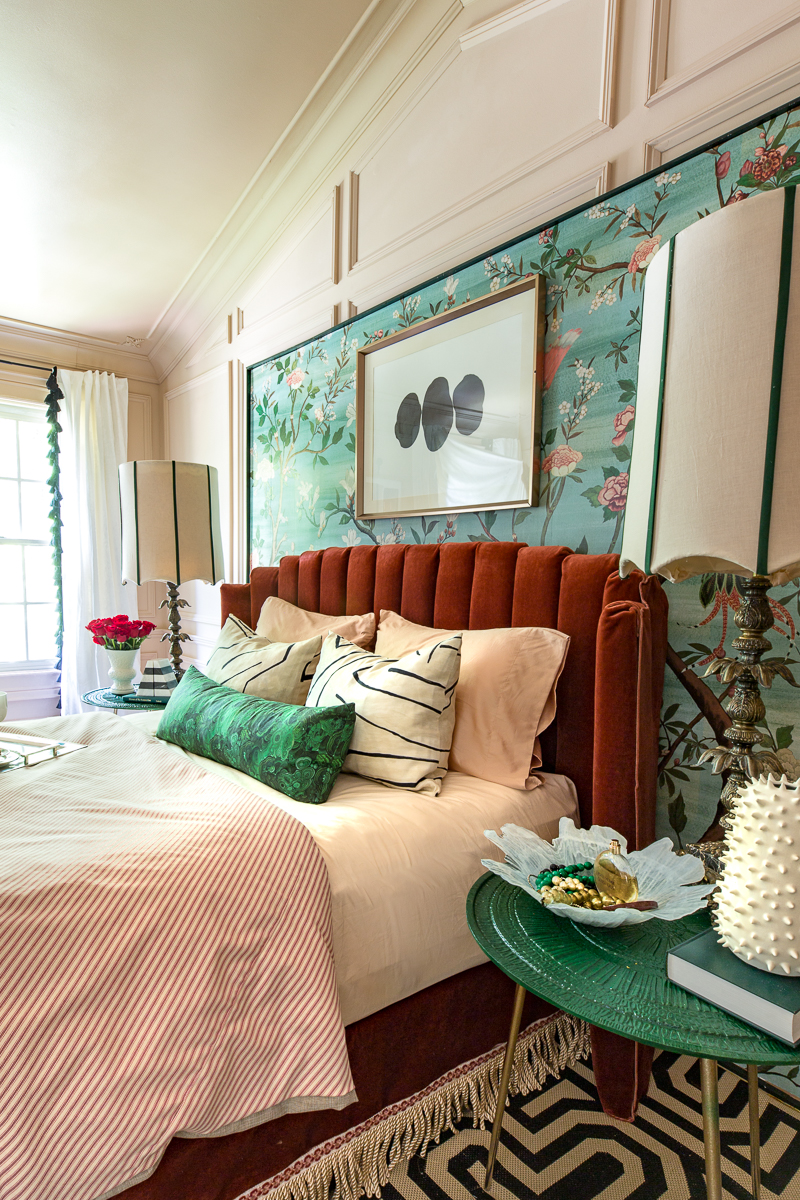
You may have seen the recent makeover of our Master Bedroom for the One Room Challenge. Many people have asked how I made this unique bed, and I say “Give the people what they want”. With that thought in mind, I present to you an easy channel tufted headboard DIY tutorial.
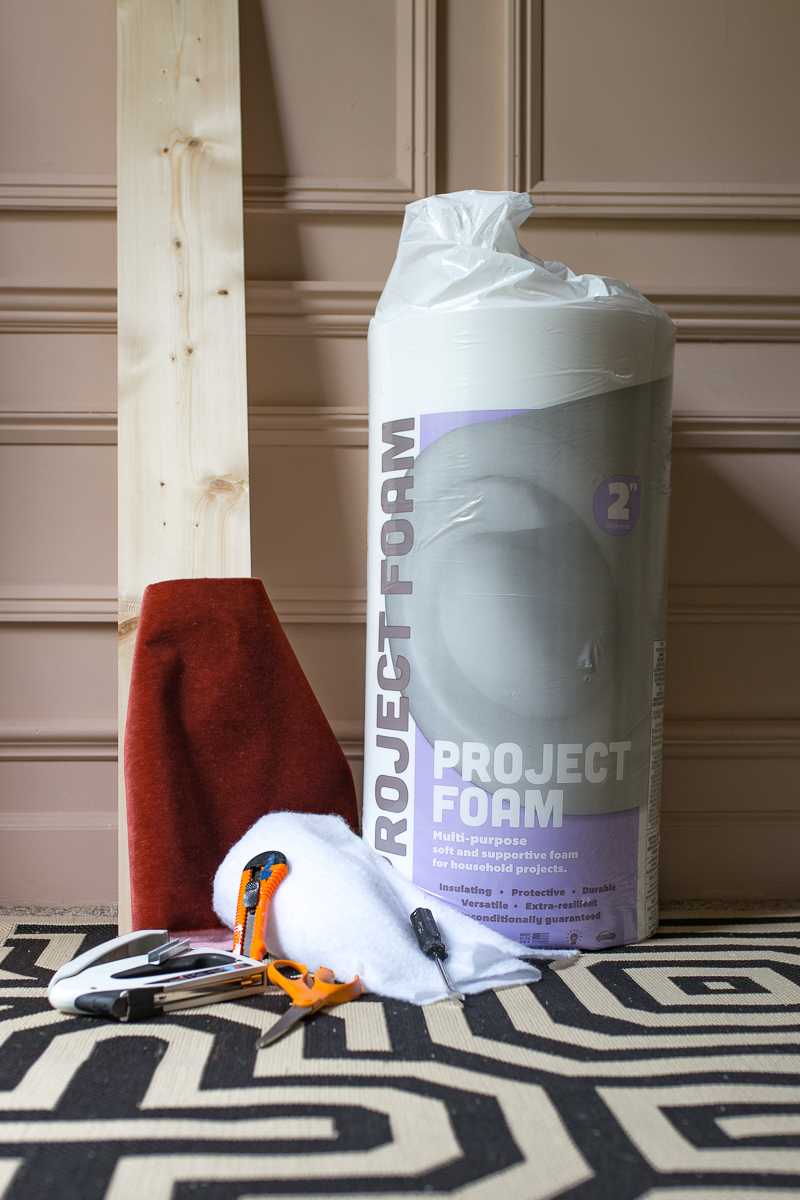
Supplies for channel tufted headboard DIY
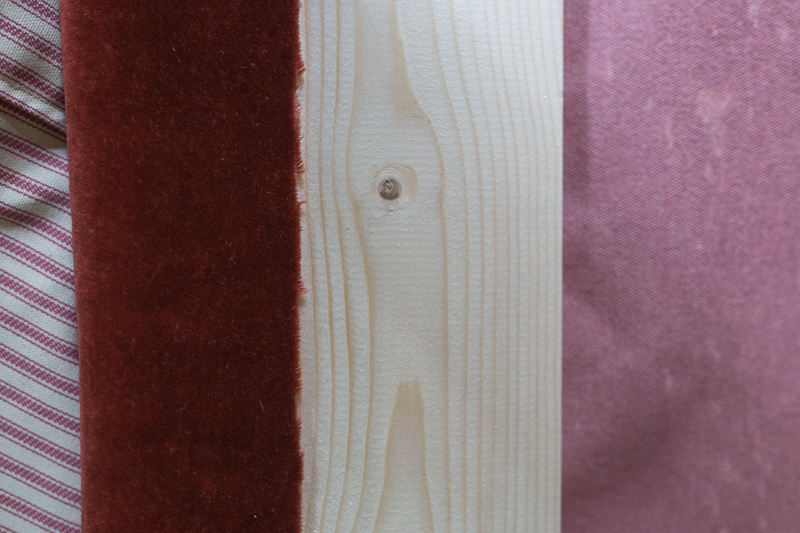
Old bed frame- with headboard shorter than your end desired height (See pic below)
2 packages of 2 Inch Foam
14 1×5’s (perhaps an extra in case you mess up)
11-12 yards of the fabric of your choice. I bought my high end upholstery grade velvet at Fabric Place Basement.
2 packages of quilt batting
Utility knife and scissors
Staple gun and staples
Screw driver and screws
Ribbon or leather
Optional: Fringe
Step 1

Step 2
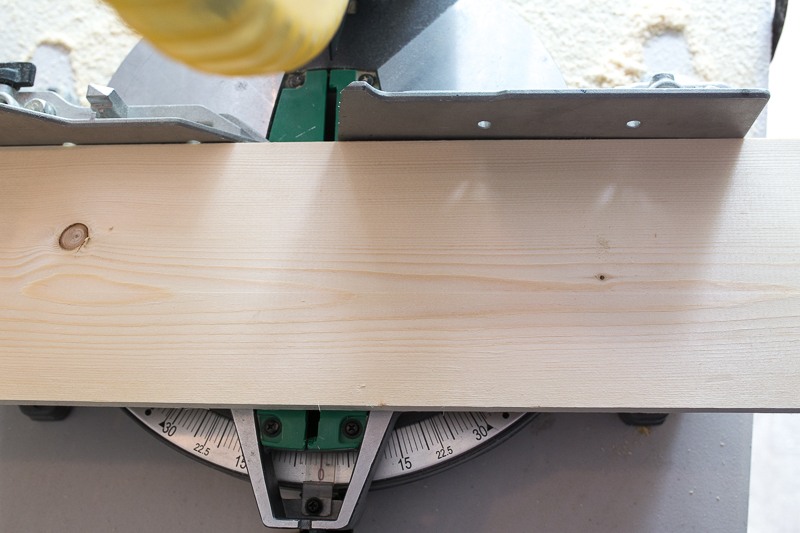
I cut the boards to various lengths. I used straight cuts. For a more dramatic channel tufted headboard DIY look I could have notched the corners like a dog eared fence post.
If you are looking to mimic my bed exactly, here are my measurements of the height of my finished product. Keep in mind that two of these boards may need to be short enough to accommodate for your bed frame.
48 in board x 8
47 in x 2
45 in x 2
42 in x 2
Step 3
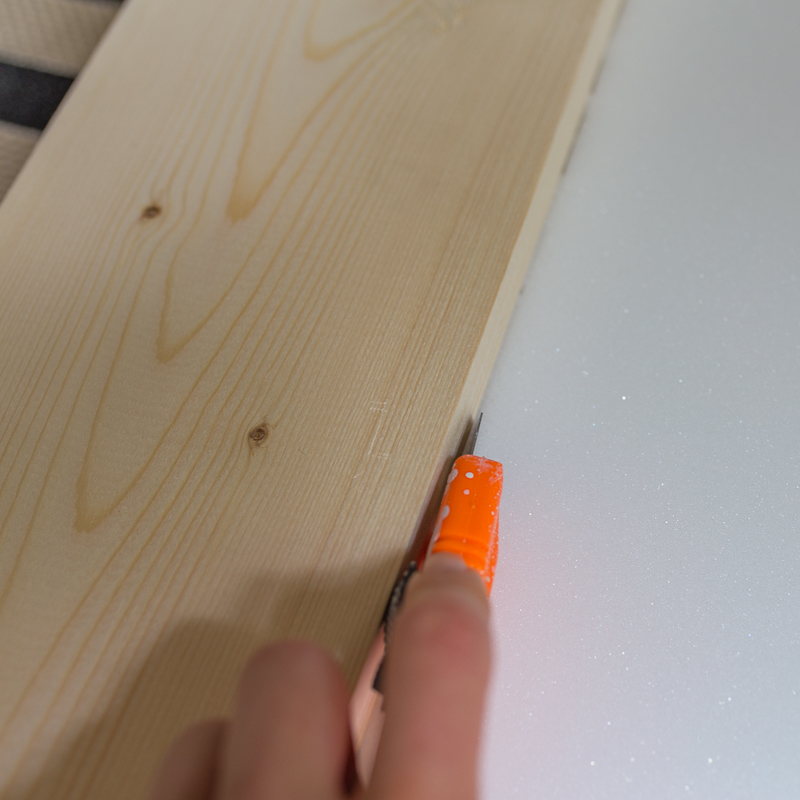
Next, I laid the board on the 2 in foam. I used the utility knife to score right along the board’s width and scissors to finish the task.
Step 4
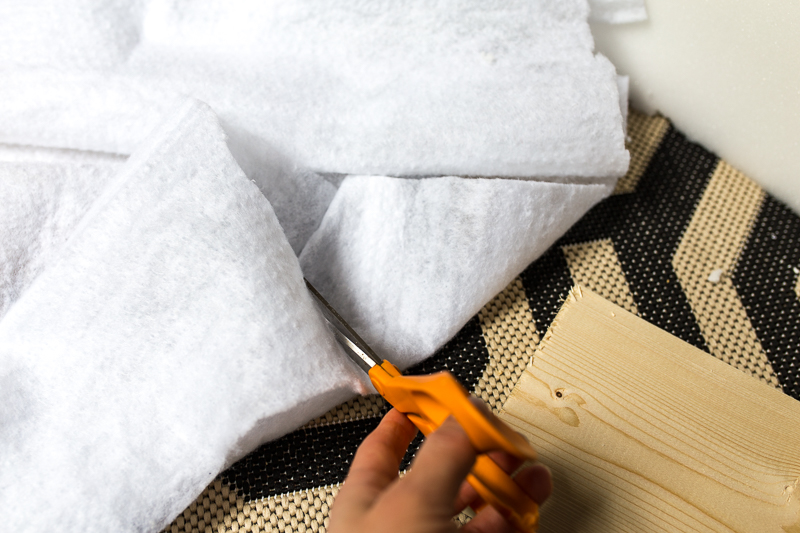
After laying the board AND the foam on the batting, I estimated how much fabric I needed to leave about 2 inches on each side. Then, I cut out all of the rectangles.
Step 5
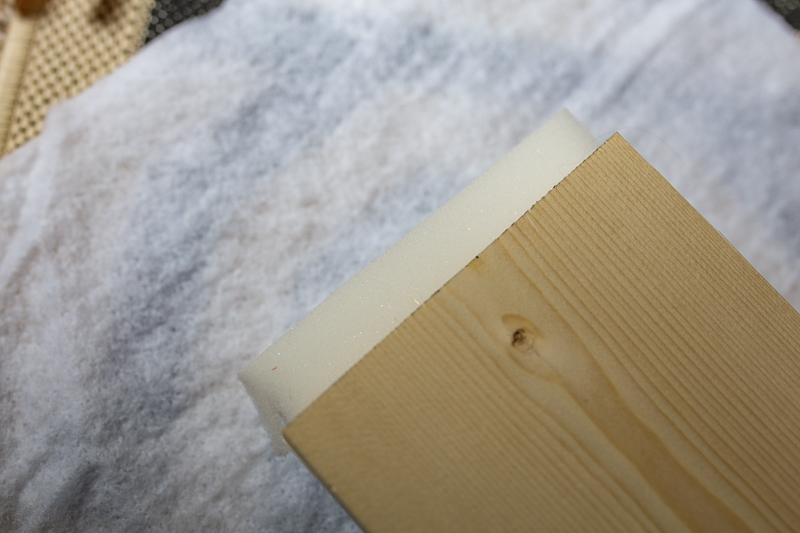
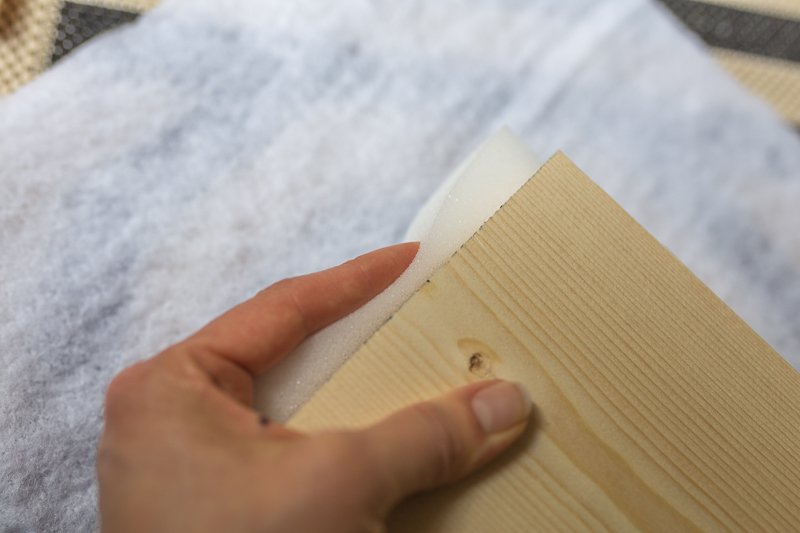
I sandwiched the foam between the board and the batting. I made sure to leave about an inch of batting at the top to ensure an evenly upholstered look across the top of the bed. I upholstered the foam onto the board with the batting holding it in place.
Step 6
Then I added the velvet on top of the board/foam/batting. VERY IMPORTANT! Make sure that nap of your velvet is going the same direction on each board.
NOTE: This images isn’t completely accurate. It is missing the batting and foam.
Step 7
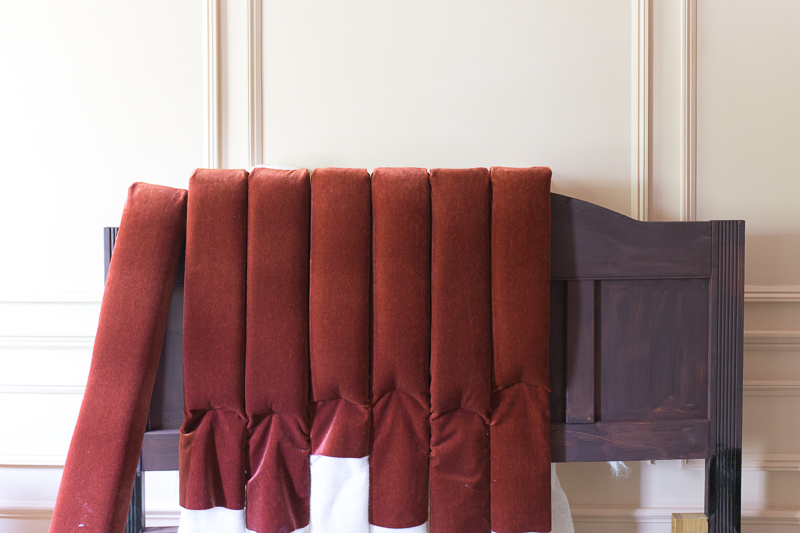
Then decide the style of bed you hope to achieve. It would be easy to make the headboard straight across the top. A seashell shape could be fun too. I however, opted for something in between and gave a slight curve to the bed by gradually shortening the three outside boards on each side.
Step 8
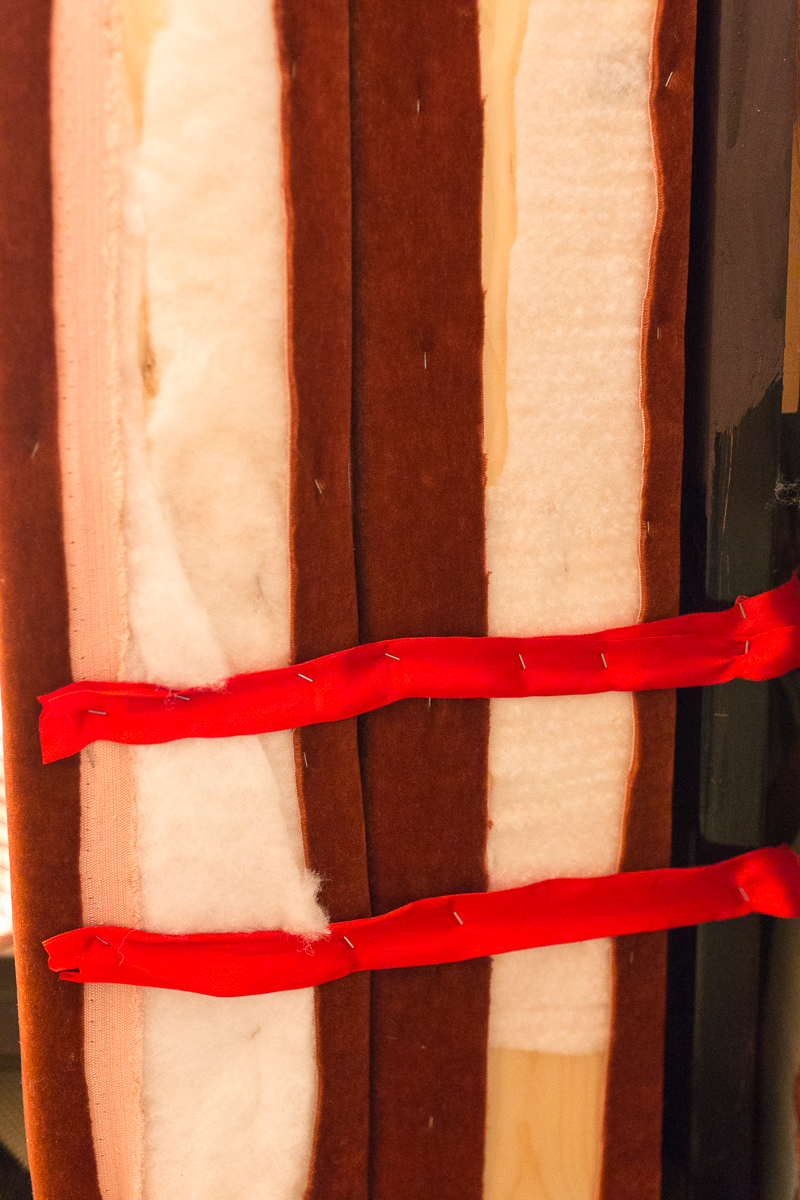
Because I wanted to give the bed curved “wings”, I screwed each of the boards and the headboard to each other at angle from above, then reinforced it with ribbon and staples. Leather (or faux leather) strips and screws may be a more sturdry option. No one in my family, however, climbs on our headboard, so this should work for us.
Step 9
Then I stapled fabric to the sides. With 11 yards of fabric I barely had enough to finish this job. If I had extra I could have sewn a double welt to cover my staples. Due to the angles, however, I think it looks fine without.
Optional: I sewed fringe and trim along the bottom and made a bedskirt (14 inches total length for my height of bed). I simply stapled the bedskirt onto the box frame.
Ta Da!!!!
Thanks for joining me on this channel tufted headboard DIY! Please DM me images of your finished results on my Instagram.
Want more DIY bed ideas? I’ve got a couple of more tricks up my sleeve

Love! Love! Love! Where do you buy your velvet? Is there any stretch to the velvet?
You’re so creative!! I love how you did this!! Looks so regal my friend!!
I bought it at Fabric Place Basement. They are in Boston and DC but ship. I love their prices, especially on upholstery velvet. Nope, no real stretch. Good luck!!!
Thats too kind, especially coming from you!
Thanks for sharing this DIY, and thanks for introducing me to Fabric Place Basement on your last ORC! I’m in the DC area too, so they’re now my new home decor fabric go-to!!
I love how your creative brain works! I never would have thought to do this!
Thanks Kristen…It came out differently than I had originally planned, but I love it.
Oh Good Justine! I love that place. Great service too.
Wow! You are just so insanely talented!
That is so kind Jessica!❤️❤️❤️. Maybe a little talented and insanely brave?
You are forever inspiring!!!! This is such a clever and beautiful DIY!
Thanks so much Miranda!!!
Hi, what’s the specific color of velvet you picked? I’d like to order it online 🙂
Hi Vanessa!
I’m not certain, but if you called Fabric Place Basement in Alexandria, VA they may be able to help you. So sorry that I don’t have that info!!!
Love the bed and the room. Came out so beautifully. Wondering what size your bed is? I’d love to recreate something similar. I have a king bed, and wondering how you would much materials I should add, if your bed is a queen? Any help would be awesome 🙂
Great point Ashton. This one is a queen bed. Good luck!
Thanks for the tutorial! About how much did you spend total from start to finish on this project?
Hi Mary! I actually don’t remember. It was over a year ago and I should have kept track. I will tell you that the major expense is the cost of your velvet. I was able to get high end velvet at a great price at our local discount fabric store.
Hi I love love the wallpaper, I am
Presuming it’s wallpaper can you give me details on where to locate? Thankyou
Hi Catherine! It’s from Anthropologie:)
Could u not just use fabric wrapped foam without the 2×4? Might not be able to achieve the curved edges but it would be a little easier and for anyone who doesn’t have power tools etc. just a possible thought
Hi Steph,
That’s an interesting idea. Do you have a foam in mind that is strong and hefty? I’m blanking on what type you might mean, but would be curious to find out.
Thanks!
Jewel