
Bathroom Tile Paint | How I Did it & the Review
Week 1- Before pics | Week 2 | Week 3 | Week 4 | Weeks 5-6 | Week 7- Unique Bathroom lighting | Week 8- BIG REVEAL | Tile Paint
I’ve had so many people ask about my experience with using tile paint for our One Room Challenge bathroom refresh that I thought it would be beneficial to write a tutorial and honest review about my experience. I learned a lot in this process and sincerely hope that it is a helpful post for anyone looking to refresh their bathroom or kitchen tile.
Bathroom Before Tile Paint
I wanted to refresh this bathroom vs completely gut it. The previous tile surround was admittedly boring, but otherwise in good condition. I figured that extending the tile to the ceiling and painting it all to match the wallpaper would be a cost effect and easier option that ripping out the shower back. Plus, I eventually want to replace the shower hardware, but plumbing and advanced tiling are not skills that I have. Painting, however, seemed right up my alley for the amount of effort/time that I wanted to put into this project. Someday I will gut the entire bathroom. Until then, I am THRILLED with how the room turned out.

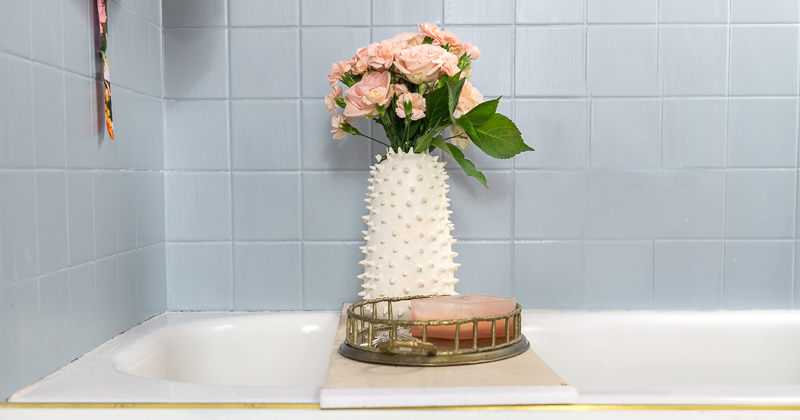
Bathroom After Tile Paint
Note: The tile paint was sponsored by Klass Kote and this is also a paid collaboration with Frog Tape, but the opinions are absolutely 100% my own.
As you look at the image, check out how well the tile blends with the wallpaper. That is an effect that white tile couldn’t have given.

How to Paint Tile
After much internet research I feel extremely blessed to have found Klass Kote, a company that custom matches tile paint. I sent them my wallpaper sample and sweated the entire times I waited for the paint to arrive. Would it really have the right undertones? Would the color actually match or would it clash? I was more than slightly nervous because this was such an important design element in the space and there was not extra time in the timeline.
Much to my surprise and delight, the color match was beautiful. Was it EXACT? Maybe not quite??? but it was REALLY, REALLY close! Closer than I could have hoped for. It was exactly what I needed to make the shower visually disapear.

Honest Tile Paint Review
Before I can give you the review pros and cons, it is helpful to know a little more about the product that I am reviewing. I took this description for Klass Kote’s homepage.
“This is an epoxy system which means there is a side-A pigmented epoxy (colors) and side-B catalyst (hardener) components. Once the two sides A & B are mixed together – equal parts by volume, it applies and covers like any other conventional paint system. When applied to properly prepared surfaces, Klass Kote Epoxy Paints, Epoxy Clear Coats, and Epoxy Primer Paint will retain their outstanding protective and decorative integrity for years”.
Pros:
Very few skills required
Faster than replacing tile, though it still took me at least half a day of preparation and several hours (over two days) to paint.
Less expensive, though not cheap. Klass Kote sent me $250 worth of product and I only used about half of it for this project.
No contractor required
Food safe after dried
Custom Color matching options (unlike other tile paints that come in white and cream)
Custom finish options
Dries quickly
Comes with extensive and easy to follow instructions
Unmixed epoxy can last in a shed for up to 10 years or more (perfect for potential touch-ups someday)
Cons:
Depending on your shower or kitchen tile, there maybe a lot of prep work to completely remove all oils, soap scum, and sealants
The smell is intense. Proper ventilation and a proper ventilator face mask are imperative. Truthfully, I had little ventilation, and a very old ventilator. It wasn’t enough protection and I felt a little ill by the end. Do NOT attempt this project unless you have proper personal protective equipement.
Another Lesson Learned:
If I were to do it again I would have opted for a roller vs a brush. If I look closely in some areas I see brush strokes that could have been avoided with a roller. If I want to improve the smoothness of the brush job, I could buff the paint using a very high grit (1000-1600 grit sandpaper wet or dry). This process would smooth out the brush strokes and leave a smoother job.
Am I glad that I painted the tile?
Absolutely! I am thrilled with the entire space. The color is gorgeous. It is actually incredibly close the Farrow and Ball’s Parma Gray, if you have their color sample card. It is also a beautiful fit with the Hygge and West wallpaper that I used in this space.
If I ever do it again I will ensure that I have a better mask and goggles.
Now let me show you how I accomplished this look, step by step.
Tile Paint Supplies
Klass Kote Parts A Epoxy and Part B Catalyst (they will help you with part when you call)
Epoxy Reducer #500- Can be purchased at Klass Kote
Optional: Klass Kote Parts A and B Primer
Scouring Pad/steal wool/Soap Scum remover
Caulk remover or screw driver
Paper Towels
Drop Cloths
Sandpaper
Oil Based Paint safe brush/Roller/or Sprayer
A mixing bowl not made of plastic
Wooden stir stick
2 matching glasses or cups (not plastic and not reusabe afterwords)
IMPORTANT: An intense Charcoal Activated face mask respirator | Half mask with goggles or full mask
Chemical Gloves and all other Personal Protective Gear
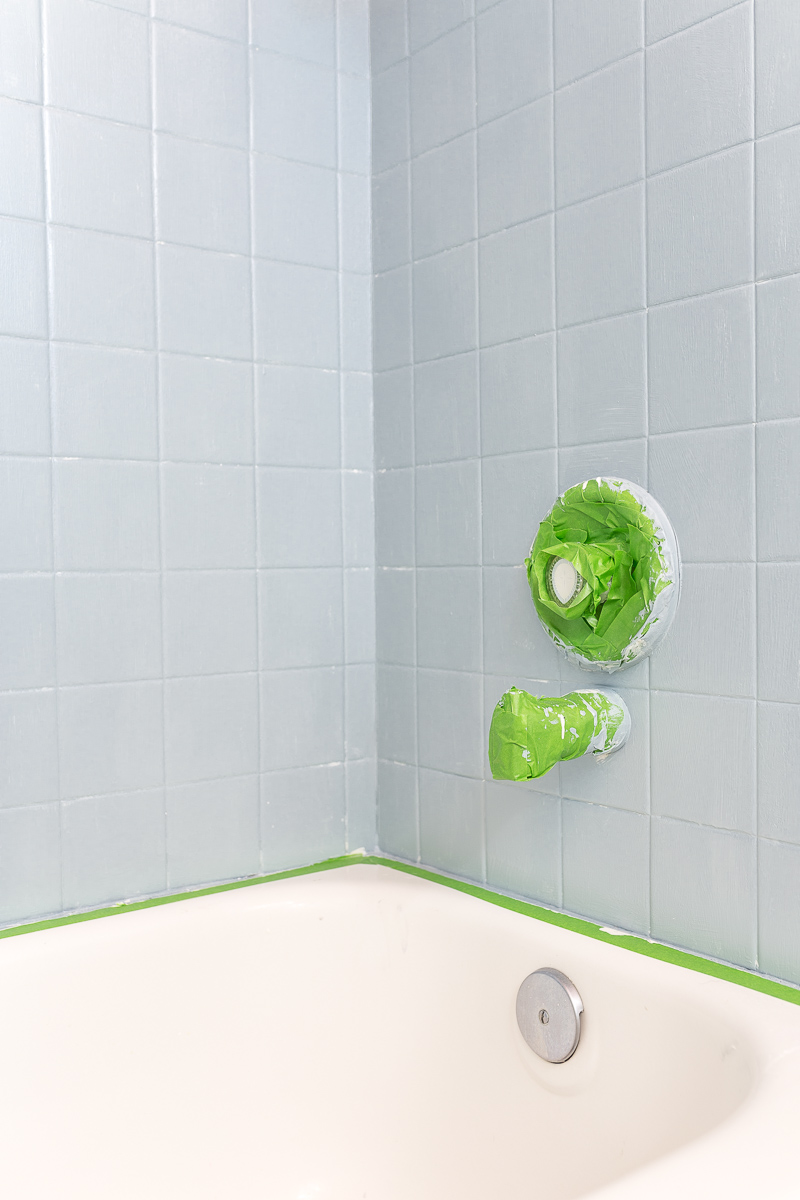
Tile Paint | Step 1 | Prep
REMOVE ALL CAULK

Nate from Klass Kote suggested that I test-run any tape products with the epoxy paint on a spare tile for at least 24 hours. Based on my timeline for the One Room Challenge, I just didn’t have time to wait a day. Instead, I crossed my fingers and went for it. In the end Frog Tape proved to be compatible with the Klass Kote epoxy system, but it was a nerve-racking 24 hours. Would other tapes have worked? Maybe? I’m honestly not sure, but Frog Tape worked great for me and didn’t blister, peel, or cause any issues.
I opted to just use the tools I had on hand. A screw driver, tough perhaps more tedious than a caulk remover, eventually did the job.
REMOVE ALL SOAP SCUM

Soap scum is a sneaky beast and can be very hard to detect. I found it helpful to use a steal wool scouring pad. I believe that I sampled a variety of cleaning solutions including Dawn dish soap and vinegar and they may have helped a bit. In the end a little “elbow grease” was the most effective approach.
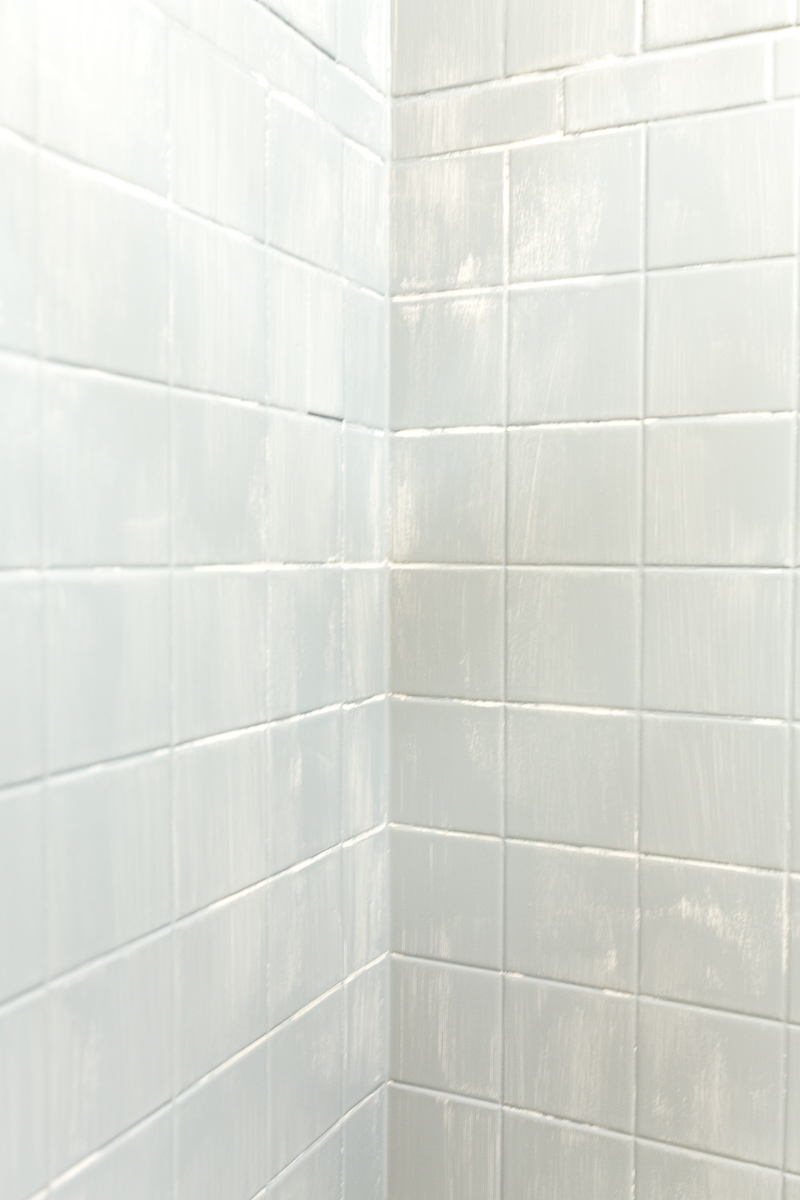
Painted Tile | Step 3 | Frog Tape

Painted Tile | Step 3 | Etching Cream
Etching creme is a “new to me” product. I’m thrilled that Klass Kote recommended it, because it saved me HOURSSSS of sanding. I simply applied the clear cream to the shower, waited 5 mins, and rinsed it off with water. It is the equivalent of keying (roughing, our sanding) up a piece of furniture before paint. The etching creme allows the epoxy paint to stick even better.


Painted Tile | Step 4 | Primer
Primer is optional depending on the condition of your current tile. For good measure we added the primer to the mix. Just like the paint, the primer is a Part A and Part B epoxy system. I mixed the equal part of paint in a clean ceramic bowl with a wooden stir stick. As recommended, I let it sit still for a short while so the two parts of epoxy could start their reaction. Then, as needed, I added a bit of Epoxy Reducer #500 to thin the mixture for optimal flow while brushing.

If there are any imperfections in the primer, wait for it to dry, then sand it smooth.
Painted Tile | Step 5 | Paint
YAY! This is when the project starts to get fun. Like the primer, the paint is an epoxy system. Mix the two equal parts together, stir very well, and then apply.

Mix it. Mix it “real good”.
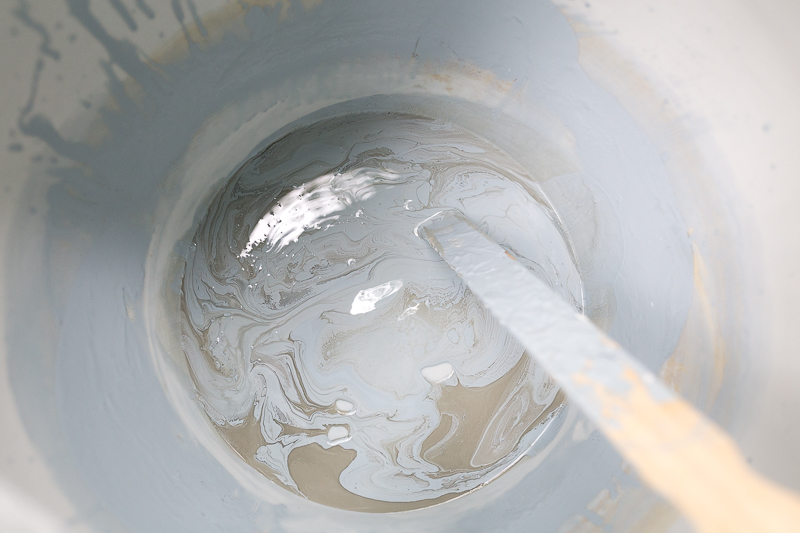
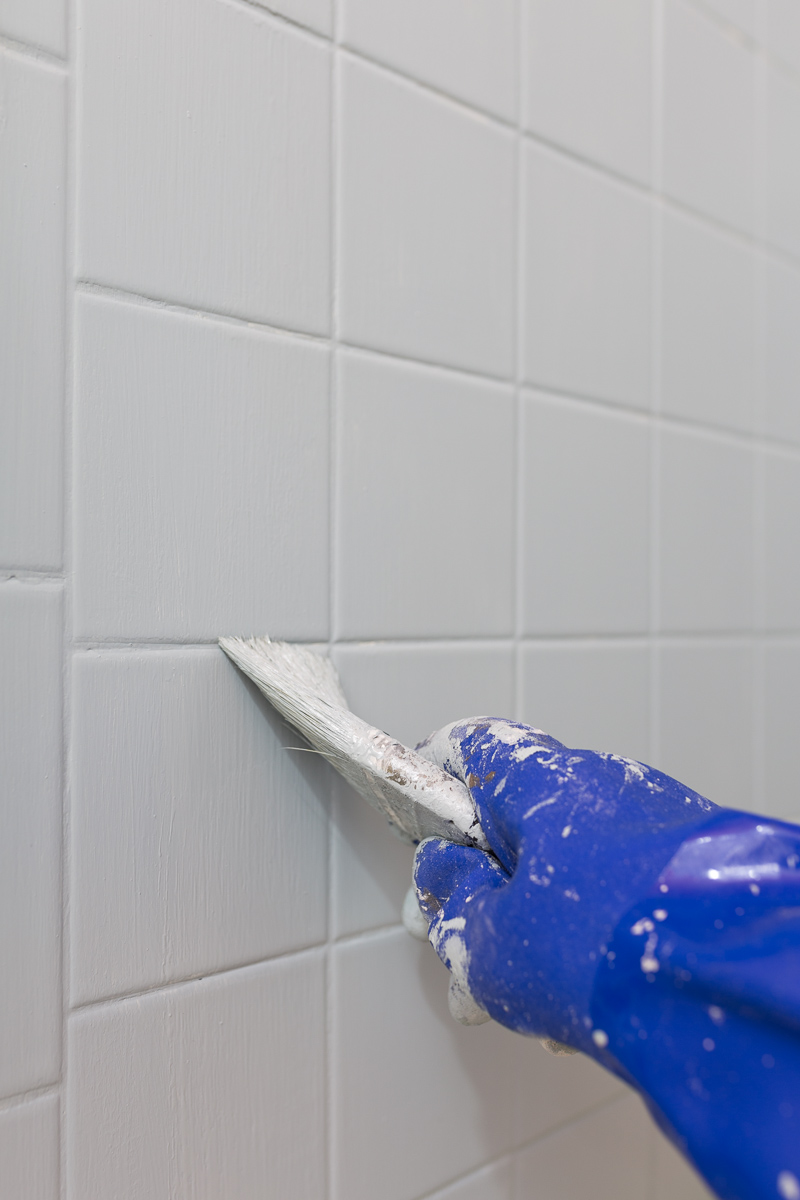
For best results spray the paint. I didn’t have the right spray gun so I used a natural fiber brush. In hindsight a roller would have provided a smoother finish. Luckily I ordered a satin finish so my brush strokes aren’t that noticeable.
Ok…Don’t freak out. I’m preumptivly talking you off that ledge. The first coat looks horrible…but doesn’t it always in any other paint project? Just breath (through your ventilator) and keep on painting.
For quicker drying times you can use a dehumidifier and/or heat the room.
Painted Tile | Step 5 | Paint
Sand if required, but assuming that everything looks beautifully smooth from the first coat, you can move onto the second.
Here is probably my worst brush stroke, but I wanted to show you so that you will be persuaded to go team roller vs brush only.
If you don’t quite get it all in the second coat it is ok to do a third touch up coat. Either way works.

Painted Tile | Step 6 | Remove Frog Tape

Removing the Frog Tape was the very most fun part of all. Isn’t it always? Clean lines and a call for celebratory rejoicing over another project complete!

Following the shower I changed the floors, installed wallpaper, hung the curtain, and repainted the ceiling…twice more.


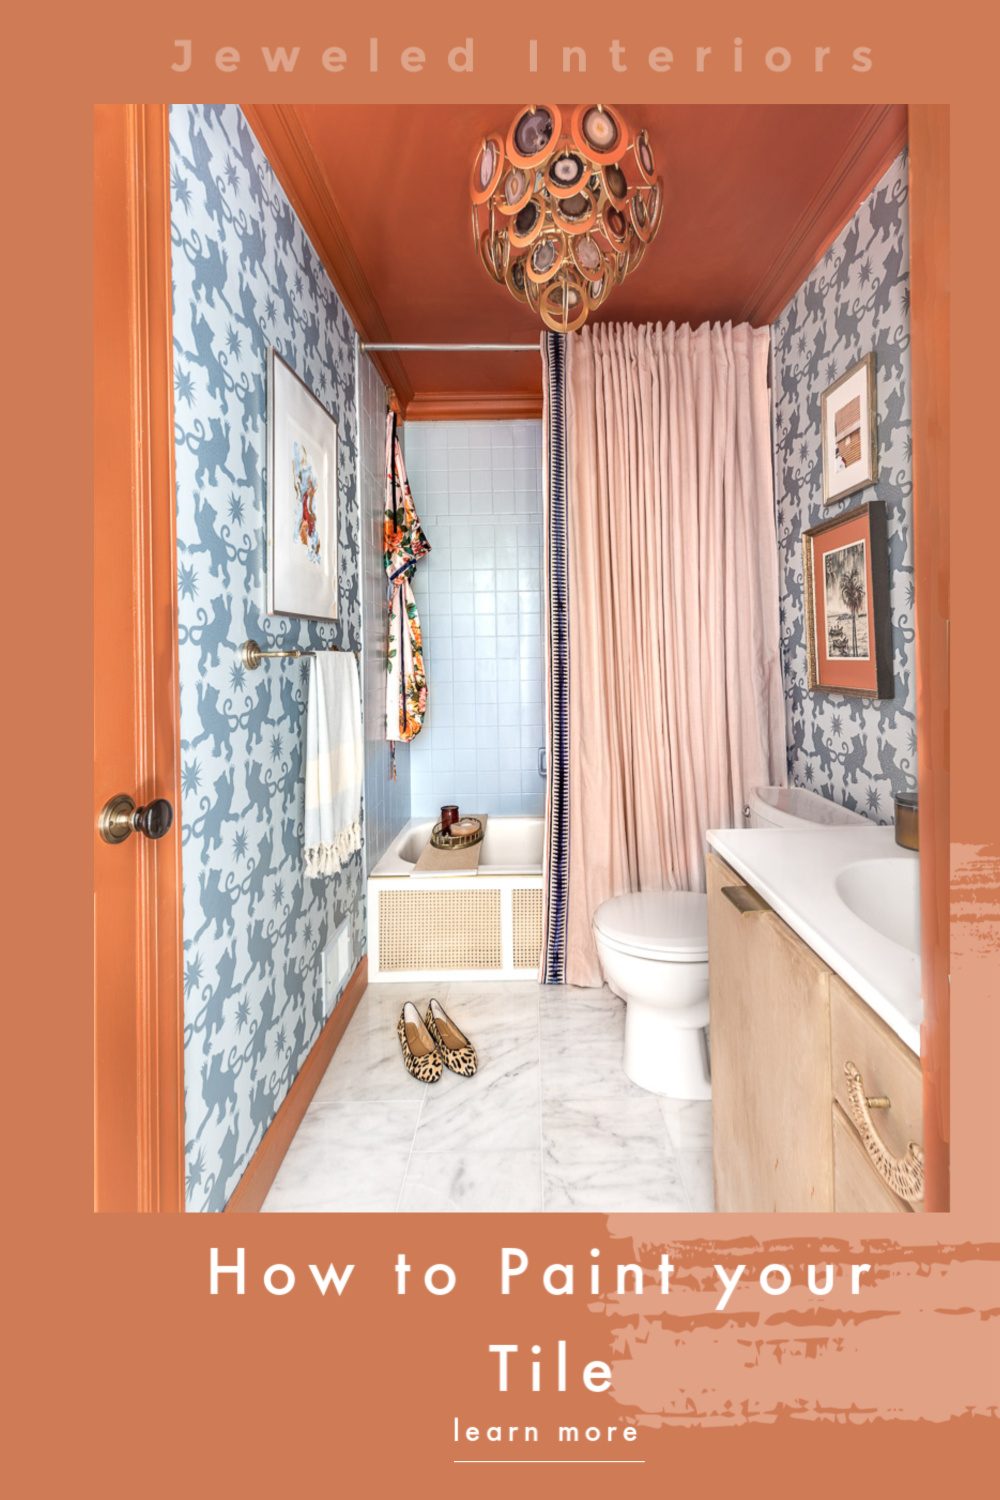

The tile color with the wallpaper is just such a gorgeous look! Still not over how pretty this space turned out
Thanks so much Ashley!
Your project looks great! I’m about to use Klass Kote to paint my tub. Did this smell up your entire house? And if so for how long and how bad was it?
Hi Emily
I definitely smelled on that floor for a little bit. I can’t remember how many days. It is holding up for me so far still though.