
I’m excited to share moulding and trim ideas as I show you how to calculate panel moulding boxes and introduce you to our new NYNR Challenge space.

Moulding and Trim Ideas
Today marks week 2 of the New Year New Room Challenge Refresh hosted by the ever so talented Stephanie from Casa Watkins Living. I had originally planned to tackle my pantry, but my fun wallpaper and organizational supplies will not be available in time, so I’m switching gears to my son’s bedroom. I’ll also be sharing moulding and trim ideas for your next project.
The Metrie moulding was originally sponsored, but the opinions are 100% my own.
Don’t forget to check out the links to the other talented participants at the end.
Week 1 | Week 2-You are here | Week 3 | Week 4
Moulding and Trim Ideas are Needed in this Bedroom
So, the fact that my son is even considering a makeover is blowing my mind. He has seen the chaos of construction that I wield while upgrading moulding, slapping up paint, and hanging wallpaper. Is he absolutely thrilled with the idea? No, but he did help me hang chair rail…and the thrill of a power tool softened him up a little. I want to show you where we are at now and give you a vision for the future.
")
This is the current state of his room, actually an hour before we started installing the chair rail and 20 mins after we cleaned out the Legos…oh so many Legos.
")
Here is a snap of his old Target bookcase that is about to be replaced by a fine Henredon campaign style bookcase in perfect condition that I scored last week.
")
This is his dresser that I am not allowed to touch because he says it has too many memories. I actually do understand where he must be coming from to some degree. He has moved six times in his short life, so I think I should respect that he wants to keep some things the same…though I might change the blues ever so slightly to match better if I have time. Shhhhhh.
")
What’s behind door number one and two? I might show you someday, but it’s clothes, blankets, and more Legos. I might beef up the architrave above the closet, window, and door if I have time.
")
So you can see the room is rather boring, slightly dated, but really not THAT bad for a little boy’s room. That is why it has survived in it’s original state as long as it has. My plan for this room is to install panel moulding on the lower third, add crown moulding, and wallpaper the upper part so that it looks something like this:

Moulding and Trim Ideas
While I was planning out the moulding and trim ideas for this space I remembered how often I am asked how I figure my calculations for my moulding.
In some ways this is a very simple answer…See the end…but in others it really depends. It depends on the style and design I am going with, and the scale of the room.
Since I use Metrie Option {M} moulding the scale is easy. They sell their products in collections and tell you what size you need, depending on the height of your room. I usually use their New Traditional and Bohemian lines and find it easy to mix and match pieces in a collection because I know the scale is calculated to work with each other.
Then the only remaining questions are:
1. What style boxes do you want to hang and 2. How far apart do you want to put the pieces.
I’m going to show you some examples of some of my projects and tell you the scale in between the panel moulding.
GET READY TO PIN!

This is my latest project and my client had 8 foot ceilings (no I swear! Really!) and I used this chair rail with my favorite panel moulding piece and spaced them 2.5 to three inches apart. I kept the original builder’s baseboards and crown moulding.
-2")
This is also an eight foot ceiling in our kitchen. I used the same chair rail with this panel mould piece and spaced them 2.75- 3 inches apart. I also use the New Traditional crown and replaced the baseboards with door casing because I liked the look and scale. It is ok to experiment with pieces and place them in other locations. For example, I have used door casing as architrave tops in the basement because the ceilings were too short to go much larger.
")
This is our basement and it has less than 8 foot ceilings ( 7 ft 8 inches)…again, I’m not pulling your leg. It looks taller because of the vertical wallpaper and the chair rail is placed lower than normal (the top is 29 in H). The space between the panels is three inches accept for the space from the top of the floor board to the bottom of the panel mould box. I used the same chair, crown, and panel mould as the last image.

Our Dining Room has eight foot ceilings and I kept the original builder’s crown, chair, and floor boards but added extra ceiling pieces and the panel mould.
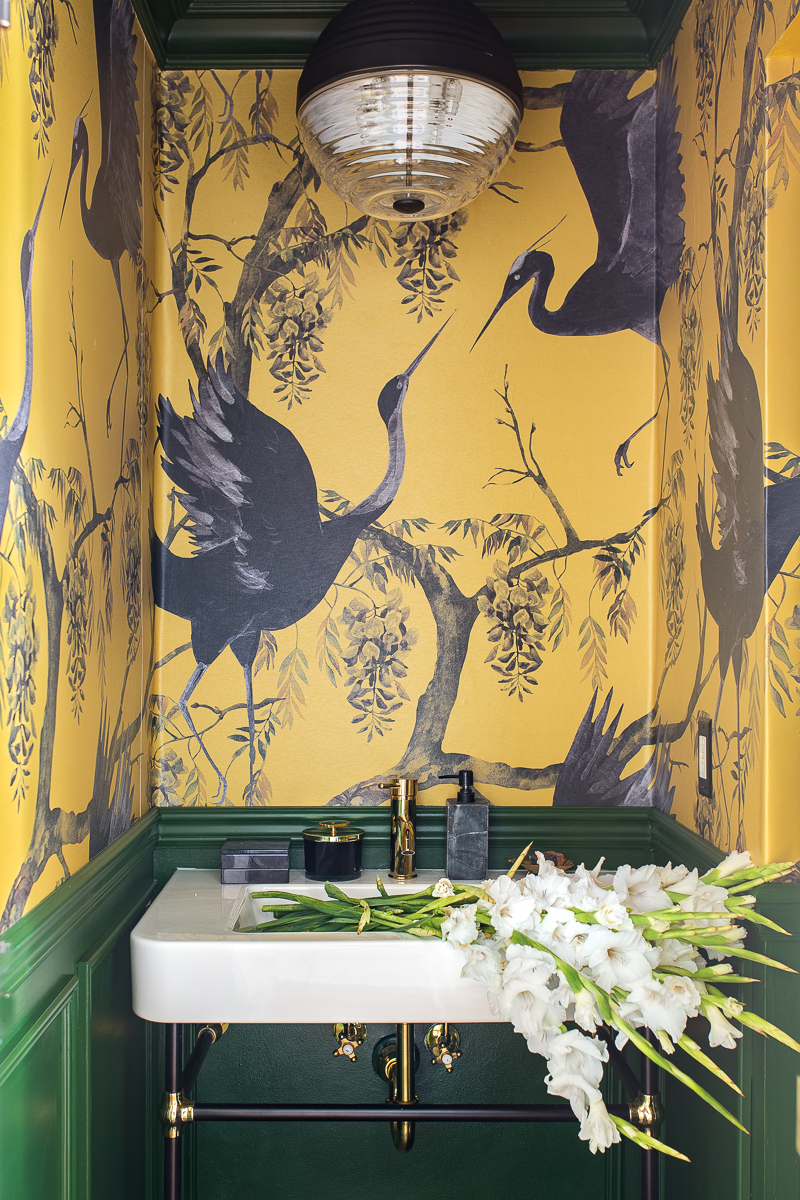
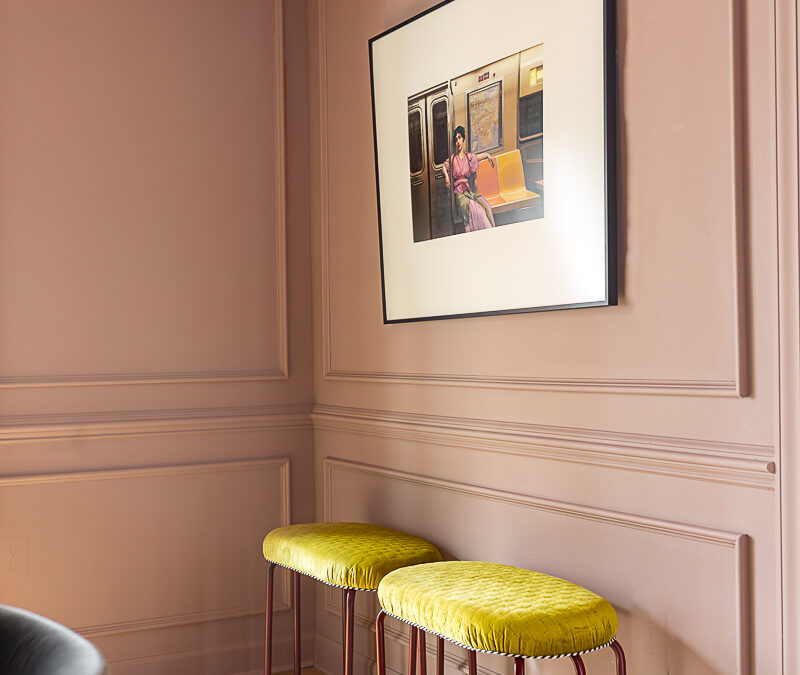
I broke with tradition on our Bathroom and installed a different chair rail than I normally do. There are several reasons, and it may be helpful to explain why. My normal chair rail extends out quite far (1-1/8th inch imperial thickness). The bathroom is a very small space with an outside miter cut on the right side of the sink. Plus, there isn’t much room between the wall and the pretty faucet. For those reasons, I opted for a thinner chair rail. Part of me wishes I had used this chair rail in my son’s room. I’ve snagged myself on the thicker chair rail twice on an outside mitered corner.

This space is just outside the bathroom in the last image. It already had chair moulding and floor boards. I only upgraded the panel mould to coordinate with the other zones. What I want to point out in this space is that I didn’t install crown moulding. Instead, I wallpapered all of the crazy nooks and crannies with small scale wallpaper. I didn’t want to draw attention to the fact that the ceiling was wonky. That was a conscious decision and sometimes it is ok to skip certain pieces of moulding if you want to minimize lines in your home.

Alright…now on to the larger scaled rooms. Our living room is around 14 or 15 feet at the center (I think?). It could handle chunkier moulding. See how much thicker that crown is than the crown in the other rooms? Side note, this crown piece is symmetrical so it is a tad easier to hang ;). See how I also employed ceiling pieces to give the illusion of even taller walls? I used a differentmoulding on the panels in the space. Actually, it is the same moulding I used in the entryway. Interestingly, I used the same chair rail that I usually install in between the panel filled murals. The scale looks great here and it flows right into the kitchen/ eat-in area. In those zones, however, I did switched back to smaller panel mould.

This was our entryway two years ago. The silly rug is gone, but the moulding still looks just as great. See how we used the floor as the design for the chair rail? Then we filled in the boxes based on this design. Not going to lie, the angles were not easy on this project, but the results are so satisfying.

And finally, the bedroom. The space that I get asked about the very most. I’m glad people noticed because this took a week of my life to hang. 🙂
Why did I put the wallpaper on a panel vs on a wall? Three reasons 1. I wanted the boxes behind the headboard to mimic the boxes on the opposite side of the room and large boxes like those in the living room wood have looked weird. 2. At the time I didn’t know if I would be moving and wallpapering the plywood seemed like there might be a small chance that I could take it with me…though now I’m certain it would never make the move 3. Jess from Domicile37 told me it would look ridiculous if I did it the other way. LOL. So, a screen behind the headboard it was. If you move the headboard, however, you will see boxes in this pattern.
-2")
The ceilings pitch from 8 ft to 10 ft tall, though the moulding make it feel taller. I have the chair rail low, 29 inches, and the break towards the top at 87.5 inches (at the top of the door frame). Each box is about 35.5 x 56 inches. I left a solid 3.5 inches between everything.
If I were to do it again I would have replaced the base boards and put a miter on the architrave and window casings.
In this room I actually used a different panel mould from the New Traditional line. It is larger and more angular than other zones of the home.
Should each room or your home have so many times of moulding? LOL, it’s probably not the ideal, but this has been my experiment and I’ve learned so much along the way. The only saving grace is that I have at least kept my section to two of Metrie’s lines (plus some occasional builder’s grade pieces still left in tact here and there).
How to do the Math
Now that you have a vision, I want to show you how to calculate the width of each box.
For the ease of conversation we will assume that you are doing a 3 inch space between all of your trim, but really it could be more or less, depending on your style preference.

Really, all you need to do is measure out the width of your wall (X) and how many boxes (Z) you want on each wall. Take the length of the wall and subtract the total amount of blank space (Y) that will be between all of the boxes. Then divide that by the number of boxes (Z) to find the width of each box.
For visual learners I plugged in the measurements for the wall behind my son’s bed.

Hopefully this was helpful. Please let me know if you have any additional comments below. Don’t forget to check out the other talented bloggers, especially next on the list, Blue I Style blog , as she plans out her bedroom to playroom plan❤️.


Great post, thank you! Where can I find the bench in your son’s room design? It’s amazing!
I’m going to try to build it. It’s a design in my head that I hope to have time to tackle!
Ahh! Thank you for this!!! How did you know we were about to start this very project in our living room?? 😆 excited to see another great vision of yours come to life!!!
I’m considering adding paneling in our foyer, however their is already a diagonal chair rail going up the stairs; is there a way to plan for as much?
You are my favorite designer
Everything you do resonates with my heart!!!
Hi Karen! I should write a post on that specifically, but we have done that in our entryway. You can look on my IG page for images or here is the link:
https://jeweledinteriors.com/2019/02/two-story-entryway-reveal/
Oh good! Glad this is helpful!
Thanks so much Diane! You are too kind!
We definitely calculate boxes the same way! But I had no idea metrie moulding had recommendations on what to use per ceiling height. I legitimately calculate those too to get the proper ratios then find moulding that works (probably similar to what metrie has already done). I loved seeing all your trimmed rooms in one spot. Great post!
It certainly makes it easier! I don’t always follow their suggestions (chair moulding), but is has definitely been helpful.
Beautiful bedroom! What color paint did you use? My family room gets a lot of light and I love the way this pink calms some of it down but not too much.
Hi Liz
It is Farrow and Ball setting plaster. It ranges from soft pink to tab during the day and night. It’s so pretty.
Hi Jewel, love this post. I am a renter but sooo jonesing to do your bedroom style in my master. I have this huge pitched blank wall staring at me daily. 🤷🏼♀️ Have a nice week, as I hope we all do.
Great post!
LOL…I guess you could always take it down if you don’t caulk??? :). LOL
Thanks so much Amanda!
Love this! Question.. what if your wall isn’t symmetrical? For example, our master bedroom headboard wall has a window on the far left and our bed is neither centered on the wall entirely nor centered on the blank wall space. Do you ignore furniture placement and just make the wall look symmetrical?
This is certainly a strength and almost a trademark to your design ideas. I always look forward to how you use it. It looks so sophisticated and polished.
That is a tricky one, especially without spending a long time crunching numbers. Is there a way to mimic the window with the moulding on the other side of the bed?
If there really is no way then you have a couple of options, but I might consider making the wall look symmetrical and then decorating with asymmetrical art placement. Maybe a small gallery wall with an odd number of pieces styled very organically? It’s hard to say without looking, but making the rest of the room feel balanced, yet intentionally not symmetrical would be my goal.
Awww….thanks!❤️
Love your son’s room mood board and the moulding and trim tips are great! I’m always looking for examples with 8 foot ceilings so it was really helpful. It’s amazing what it can do for a room vertically!
Thanks so much Kathy!
This is so helpful! Do you only recommend using one color on the wall if you have moulding on both the top and bottom? I noticed all your rooms with moulding only on the bottom have wallpaper on the top. Trying to decide what to do about my dining room. 🙂
Hi Rebecca! The trend right now is definitely to paint it all the same color, but there is actually a good reason why that works. If it is cohesive then your room feels bigger and less choppy. If you paint the wall two toned it chops up the room and makes it feel shorter. Having said that, the room I’m working on in IG is currently two toned (until I wallpaper tomorrow) and I really like it. If feels masculine and cozy…but shorter than it would otherwise. Hope that helps.